Showing posts with label crackers. Show all posts

October 17, 2012

Seeded Crackers

IMG_7521

IMG_7517

Snack food is expensive especially with hungry teenagers and their friends always looking for something to eat.  Crackers and cheese are a favorite but tasty crackers with wholesome ingredients come in very small boxes with a large price tag.  I decided to make crackers and after looking at recipes I wondered why store crackers are so expensive - the ingredient list is small - flour, water, oil (sounds like french bread but crackers do not require the skill of a baguette). The wholesale prices companies pay for the ingredients, plus the cost of getting a product to a mass market - I figure there must be around a 500% mark up on crackers. At 4-5 dollars for a box of small  crackers at Whole Foods, I could spend $20 and pass the boxes to four teenagers and they would still say "what else is there to eat."

These crackers are so tasty. The pair nicely with hard or soft cheeses, spread with tuna or chicken salad or just plain.  You can get creative and make up your own seed topping - maybe nigella, anise, fennel, rosemary, thyme - there are many combinations. You could chop up fresh herbs like the thyme or rosemary and mix it in with dough as well. This recipe can be mixed up by hand as well.

Seeded Crackers
Makes 3 dozen

Topping
1 tablespoon sesame seeds
2 teaspoons poppy seeds
2 teaspoons caraway seeds
3/4 teaspoon coarse kosher salt
Enough water and pastry brush to wet rolled out dough before seeds are applied.

Dough
1 1/2 cups all purpose flour
1/2 cup whole wheat flour - scant
1 teaspoon table salt
3 tablespoons olive oil or oil of your preference
1/2 cup water

Preheat oven to 450F.
Mix seeds in a small bowl and set aside. Do not add the salt at this point as you sprinkle by hand.
In a food processor:
Add the all purpose flour, whole wheat flour and table salt and pulse to combine.
Add the oil and 1/2 cup water and pulse until combined and crumbly but comes together when pressed against the side of the bowl.
On a lightly floured work surface gather dough into a uniform mass then separate dough into thirds.
Store dough under a clean kitchen towel or plastic wrap to prevent a skin forming.
Roll the first third of dough into a 1/16th inch thick 8 x 14 inch rectangle.
Keep your work surface well floured to prevent the dough from sticking. Your dough should move freely on the rolling surface.
Cut dough with a knife or pizza cutter in half then into rectangles 2 x 4 inches or to your preference.
Brush dough with water and sprinkle with 1/3 of seed mixture and 1/4 teaspoon of the kosher salt.
Press the seeds and salt into the crackers with light pressure so they stay on the crackers.
Transfer crackers to a baking sheet.
Tip:  I roll my dough out on parchment paper minding that it doesn't stick and cut carefully so as not to go through the paper.  I then can move the whole sheet onto my baking pan (rimless cookie sheet), then I just move the crackers slightly to give them a bit of room.
Bake for 7 to 10 minutes until browned.
Cool on wire rack (slide the parchment straight onto the rack).
Store crackers in airtight container or zipper plastic bag.

IMG_7519

IMG_7512

IMG_7507

Recipe adapted from Fine Cooking December 2007

January 27, 2010

Nanaimo Bars

Nanaimo Bars Daring Bakers' January Challange

Nanaimo Bars

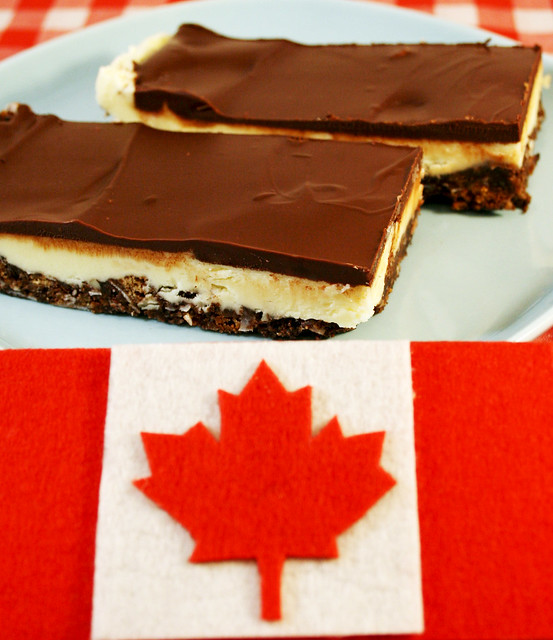
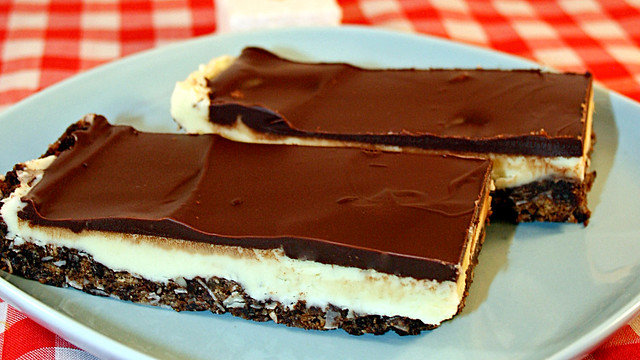
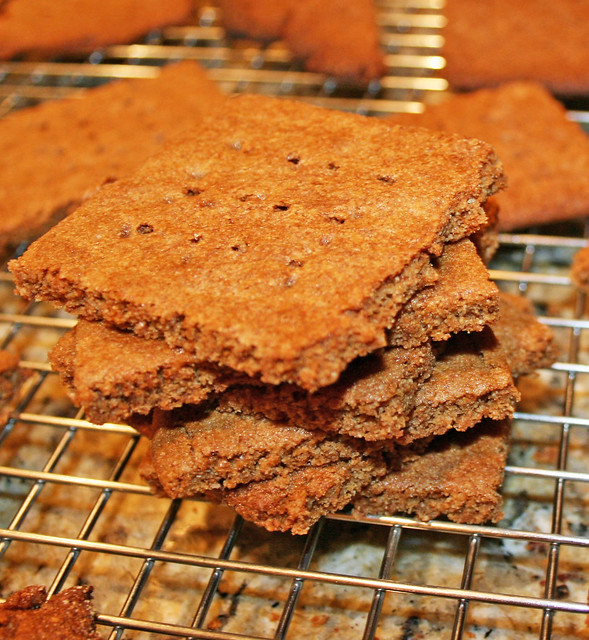
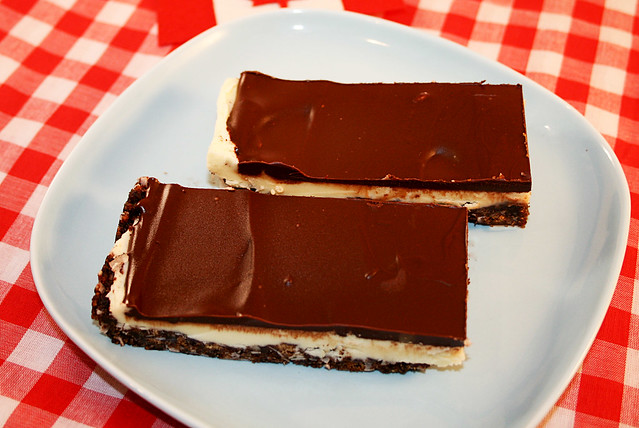
    This year's Daring Baker challenge begins with a celebration of Canada and the upcoming Winter Olympics.  We made a popular no-bake bar style cookie in Canada called the Nanaimo Bar named for the city of Nanaimo in British Colombia.  While the bar is popular for its no-bake feature, the Daring Bakers did have to do some baking!  Actually, the best part of the challenge was the homemade graham crackers because I have wanted to make homemade graham crackers for quite some time.  I chose to make my graham crackers with graham wheat flour.  When my own children were small, the graham cracker is an easy snack to give.  For a long while I used the widely popular supermarket graham crackers then becoming more aware of ingredients I switched to Trader Joe's brand which were okay.  Annie's Bunny Grahams were a favorite but they can be spendy and come in such small quantities. Lucky me, I now am happy to have a tasty graham cracker recipe in my recipe file.
    The Nainaimo bar somehow reminds me of a Magic Bar (Seven Layer Bar) except the Nainamo Bars have this center of frosting (I used pudding mix and I think maybe if I had used the custard powder it might have been creamier and more custardy).
Give this recipe a try especially if you need a dessert in hurry. If you don't make graham crackers the recipe goes quite quickly.

Nanaimo Bars
Preparation time
• Graham Wafers: 30 to 45 minutes total active prep, 2 ½ hours to overnight and 45 minutes inactive prep.
• Nanaimo Bars: 30 minutes.

For Nanaimo Bars — Bottom Layer
1/2 cup (115 g) (4 ounces) unsalted butter
1/4 cup (50 g) (1.8 ounces) granulated sugar
5 tablespoons (75 mL) unsweetened cocoa
1 large egg, beaten
1 1/4 cups (300 mL) (160 g) (5.6 ounces) whole wheat graham wafer crumbs (recipe follows)
1/2 cup (55 g) (1.9 ounces) almonds (any type, finely chopped)
1 cup (130 g) (4.5 ounces) coconut (shredded, sweetened or unsweetened)

For Nanaimo Bars — Middle Layer
1/2 cup (115 g) (4 ounces)unsalted butter
2 tablespoons and 2 teaspoons (40 mL) heavy cream
2 tablespoons (30 mL) vanilla custard powder (Such as Bird’s. Vanilla pudding mix may be substituted.)
2 cups (254 g) (8.9 ounces) icing sugar

For Nanaimo Bars — Top Layer
4 ounces (115 g) semi-sweet chocolate
2 tablespoons (28 g) (1 ounce) unsalted butter

Bottom Layer:  Melt unsalted butter, sugar and cocoa in top of a double boiler. Add egg and stir to cook and thicken. Remove from heat. Stir in crumbs, nuts and coconut. Press firmly into an ungreased 8 by 8 inch pan.
Middle Layer:  Cream butter, cream, custard powder, and icing sugar together well. Beat until light in colour. Spread over bottom layer.
Top Layer:  Melt chocolate and unsalted butter over low heat. Cool. Once cool, pour over middle layer and chill.
Freezes well.

IMG_3708

Whole Wheat Graham Wafers

2 ½ cups plus 2 tbsp of all-purpose wheat flour, or wheat pastry flour.
1 cup (200 g) (7.1 ounces) dark brown sugar, lightly packed
1 teaspoon (5 mL) baking soda
3/4 teaspoon (4 mL ) kosher Salt
7 tablespoons (100 g) (3 ½ ounces) unsalted butter (cut into 1-inch cubes and frozen)
1/3 cup (80 mL) honey, mild-flavoured such as clover.
5 tablespoons (75 mL) whole milk
2 tablespoons (30 mL) pure vanilla extract

In the bowl of a food processor fitted with a steel blade, combine the flour, brown sugar, baking soda, and salt. Pulse on low to incorporate. 
Add the butter and pulse on and off, until the mixture is the consistency of a coarse meal. 
If making by hand, combine aforementioned dry ingredients with a whisk, then cut in butter until you have a coarse meal with no chunks of butter should be visible.
In a small bowl or liquid measuring cup, whisk together the honey, milk and vanilla. 
Add to the flour mixture until the dough barely comes together. 
It will be very soft and sticky.
Turn the dough onto a well-floured surface and pat the dough into a rectangle about 1 inch thick. 
Wrap in plastic and chill until firm, about 2 hours, or overnight or put in the freezer for 30 minutes - your dough may be ready to handle without any chilling.
Divide the dough in half and roll the dough into a long rectangle, about 1/8 inch thick. 
Cut into 4 by 4 inch squares. 
Gather the scraps together and set aside. 
Place wafers on one or two parchment-lined baking sheets. Chill until firm, if necessary about 30 to 45 minutes
Repeat with the second batch of dough.
Adjust the rack to the upper and lower positions and preheat oven to 350 degrees Fahrenheit (180 degrees Celsius).
Gather the scraps together into a ball, chill until firm, and reroll. 
Prick the wafers with toothpick or fork, not all the way through, in two or more rows.
Bake for 12-14 minutes, until browned and slightly firm to the touch, rotating sheets halfway through to ensure even baking. 
When cooled completely, place enough wafers in food processor to make 1 ¼ cups (300 mL) of crumbs. Another way to do this is to place in a large ziploc bag, force all air out and smash with a rolling pin until wafers are crumbs.

If you wish to make gluten free - use this flour combination and chill dough well:
1 cup (138 g) (4.9 ounces) sweet rice flour (also known as glutinous rice flour)
3/4 cup (100 g) (3.5 ounces) tapioca starch/flour
1/2 cup (65 g) (2.3 ounces) sorghum flour

The January 2010 Daring Bakers’ challenge was hosted by Lauren of Celiac Teen. Lauren chose Gluten-Free Graham Wafers and Nanaimo Bars as the challenge for the month. The sources she based her recipe on are 101 Cookbooks and http://www.nanaimo.ca/.

Canadian Dessert - Nanaimo Bars

Untitled