Showing posts with label bread. Show all posts

May 20, 2020

Pita Bread


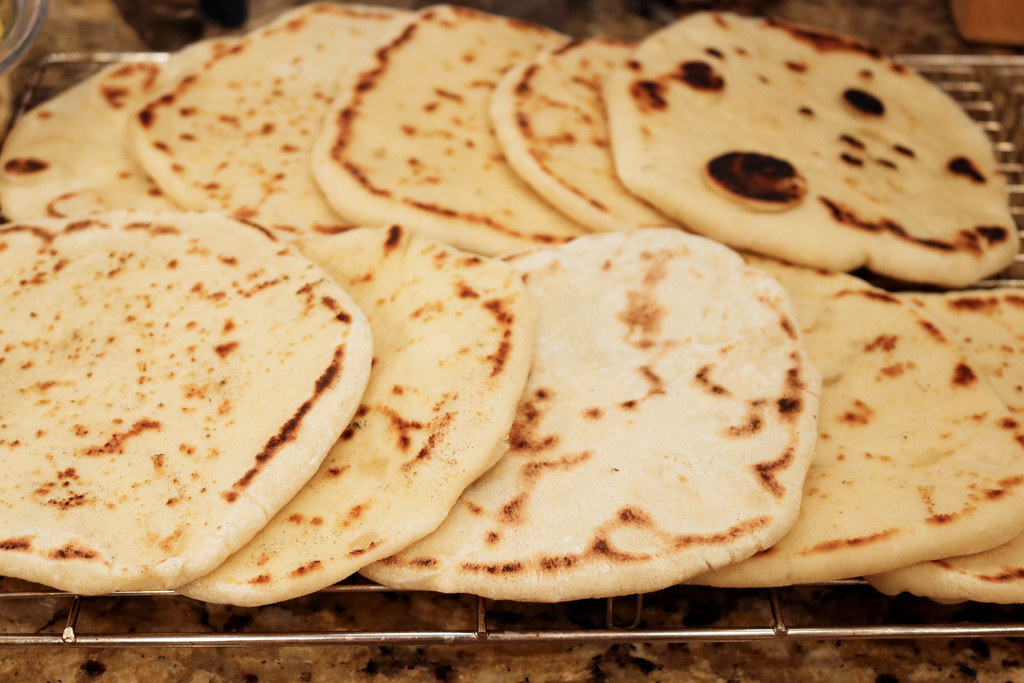
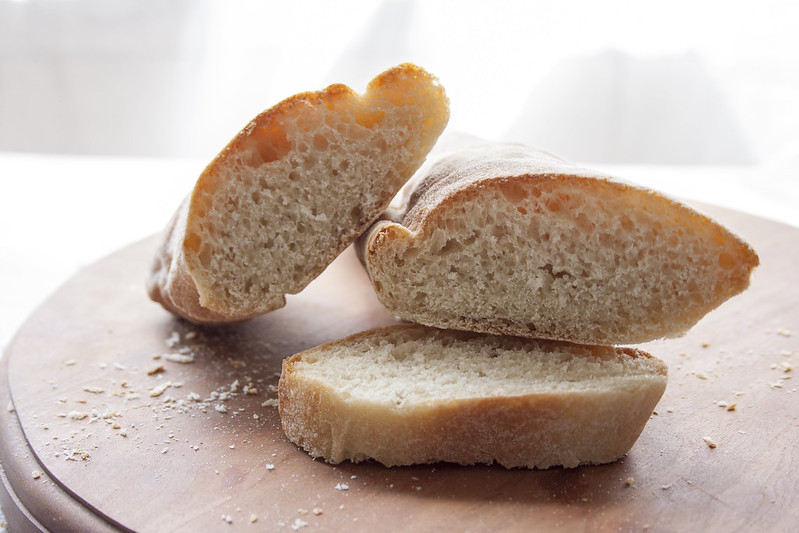
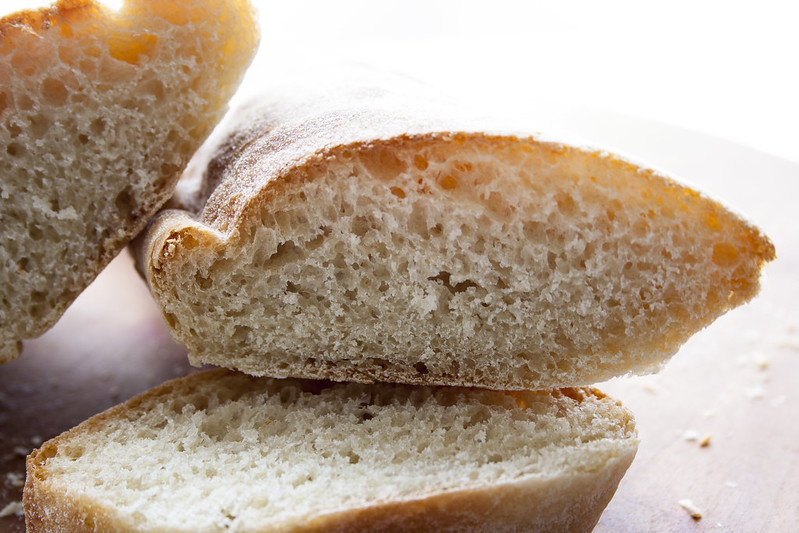
I use a cast iron flat bottomed griddle pan to cook these pitas.  I do it outside on the side burner on my barbecue grill.  I am able to achieve the high heat and the smoke does not fill the house.  The pitas are soft and delicious.


Bread Machine Pita Bread
1 ½ pound loaf
1 pound loaf


1 1/8 cups water
3/4 cup water
3 cups all purpose flour
2 cups all purpose flour
1 teaspoon salt
½ teaspoon salt
1 tablespoon oil
2 teaspoons oil
1 ½ teaspoons sugar
1 teaspoon sugar
1 ½ teaspoons instant yeast or active yeast

Place all ingredients in bread machine pan.
Select Dough Mode.
When dough has risen long enough, the machine will beep.
Turn off bread machine, remove bread pan and turn out dough on floured countertop or cutting board.
Using a bench scraper or knife, cut dough in 8 pieces for the 1 ½ lb loaf or cut the in 6 pieces for the 1 pound loaf.
Roll each section into a ball.
Roll each ball into a 6 or 7 inch circles.
Set each circle on a lightly floured board and cover with a lint free towel.
Let dough rise for 15 minutes.
Heat a heavy duty flat bottomed square grill pan, fry pan, cast iron pan.
Heat grill pan over high heat.
Brush circle of dough with olive oil and place face down on hot pan.
When pita starts to puff, brush with olive oil and turn to cook other side.
Cook until pita puffs and is browned.
Remove to a rack and cover the cook pita with the lint free towel.
Repeat with the rest of the pitas storing under the towel.
Serve immediately.
*I do this outside as the pan needs to be very hot to the smoke point.
Oven Method
Let pitas rise for 30 minutes.
Preheat oven to 500F.
Preferably on a baking stone with a rack on top or just a rack place 2 to 3 pitas on the heated rack.
Bake pitas 4 to 5 minutes until puffed and browned.
Remove from oven, place on rack, and cover with a damp lint free towel.
Serve once pitas are softened.

Pitas from the oven back in 2010


Bread Machine Buttermilk Bread Loaf or Rolls


I make these rolls often and it is fast and easy in my bread machine.  The rolls serve as the extra dinner carbohydrate for the many hungry young people my kids bring home for dinner.  The smell of home baked bread hot from the oven filled with cold butter melting is soul filling along with the family table filled with conversation and laughter. These rolls can serve as the base for smoked pork or make them larger for hamburgers, leftover roasted chicken sandwiches or sloppy joes.  

Bread Machine Buttermilk Bread Loaf or Rolls
1 ½ pound loaf
1 pound loaf


1 1/8 cup buttermilk or non-dairy milk
7/8 cup buttermilk or nondairy buttermilk
3 cups bread flour
2 cups bread flour
1 ½ teaspoon salt
1 teaspoon salt
1 tablespoons butter or  nondairy butter substitute
3 tablespoons honey or sugar
2 tablespoons sugar or honey
¼ teaspoon baking soda
1 ½ teaspoons instant yeast or active yeast


Buttermilk
Buttermilk
Add 2 teaspoons of lemon juice or vinegar to the non-dairy milk or dairy milk

Place all ingredients in bread machine pan.
Select Light Crust setting.
When machine beeps, use hot mitts to remove hot pan from machine and turn loaf on to a cooling rack.
Let loaf cool for 1 hour before slicing.

Buttermilk Rolls
Select dough mode.
When dough has risen long enough, the machine will beep.
Turn off bread machine, remove bread pan and turn out dough on floured countertop or cutting board.
Turn on proofing setting in oven, if have, or warm oven at lowest temperature for a few minutes then turn off.
Using a bench scraper or knife, cut dough in half, then half again until there are 12 to16 pieces. 
Roll each dough piece in roll shape.
Place on a parchment or Silpat lined baking sheet.
Cover with a lint free towel and place in a warm place, warmed oven, or proofing oven. 
When doubled, remove from oven and preheat to 375F.

Bake rolls 12 to 15 minutes until golden brown.

Topping, if desired

Once the rolls have risen, mix with oil chopped onion, sesame seeds, poppy seeds, herbs, garlic etc.  I often use finely minced onions and oil and salt and pepper spooned over right before the rolls go in the oven.


July 1, 2015

Mixed Starter Bread

mixed starter bread

IMG_4721a


I have always wanted to understand the mysteries of making bread.  As a small child I watched my mother mix and knead bread by hand in our kitchen in southern California.  She stood at the counter to the left of the stove and kneaded the dough with a passion.  Times were tough and homemade bread was more economical than store bought bread.  This was during the times when store bought manufactured products symbolized ease, convenience, stability and success.  I loved the smell of the yeasty dough, the magical round of dough in a bowl rising under a towel on the stove, and the wonderful smell of baking bread that filled the house.  This bread was precious even though it came about during a time of hardship it bound my family together around our small table with the cozy warmth that homemade bread brings to a home.

I have yet to master bread making but year by year I increase my skills as I continue to make and try new recipes.  I have always wanted to use a starter so this was my first attempt.  My son was inspired to make bread while I made this bread and he made No Knead Bread and we had a taste test between the two (the round loaf in the bottom photo).  The Mixed Starter bread had a deeper, richer flavor than the no knead bread which I contribute to the longer process of flour and yeast development .

Two Day Mixed Starter Bread

DAY ONE
Old-dough Starter - 8 hour rise
½ ounce of risen dough from white bread or pizza (I saved a piece of my pizza dough)
¼ cup warm water (105ºF to 115ºF)
2/3 cup unbleached all-purpose flour

Second Starter - 4 hour rise - up to an 8 hour chill
All of the old-dough starter
¼ cup warm water (105ºF to 115ºF)
¾ cup unbleached all-purpose flour

DAY TWO
Final Dough – 1 ½ hours rise
1 ¼ cups cool water (78ºF)
3/4 teaspoon active dry yeast
Second starter, cut into pieces
3 1/3 cups unbleached all-purpose flour
1 tablespoon kosher salt

Shape Dough, Final Rise – 1 ½ hours, Bake – 20 minutes

Old-dough Starter
Cut the old dough into pieces and add them to stand mixer bowl.
Add the warm water, and let sit for about 5 minutes.
With the paddle, gradually add the flour for 2 to 3 minutes.
Place it back into the bowl, cover with plastic wrap, and let it rise in a warm place for about 8 hours.
The dough will be soft, springy, bubbly and sticky.
Second Starter
Scrape old dough starter onto cutting board and cut into 4 pieces.
Place pieces in stand mixer mixing bowl and add warm water.
Let dough soften for about 5 minutes.
Mix in flour with paddle attachment and mix on low for 2-3 minutes.
This dough will be soft.
Transfer dough to large bowl, cover with plastic wrap and let rise in a warm place for 4 hours.
The dough will double and the gluten will be long and lacy when stretched and smell sweet and yeasty.
Chill dough for a minimum of 1 hour but no more than 8 hours.
Final Dough
In the bowl of a stand mixer, add the water, the yeast, and the second starter pieces.
Let sit for 5 minutes.
Add all of the flour and mix at low speed with the paddle until dough is cohesive and flour is incorporated.
Let dough rest for 10 minutes.
Sprinkle the salt over the dough.
Knead on medium to medium high for about 8 minutes.
Dough will be soft and moist.
If the dough rises up the hook push back down into bowl.
Place the dough into an oiled bowl and cover with plastic wrap.
Let it rise for 90 minutes in a warm spot (80ºF to 85ºF).
The dough will have bubbles visible under the surface.
Gently stretch and fold the dough over itself from all four "sides," and let it rise, covered, for another 45 minutes.
Baguette Shape
Portion off dough into 10 ounce pieces.
Shape into rough rectangles without smashing the dough.
Working rapidly, turn the dough upside down on a lightly floured kneading surface and pat it firmly but not too roughly into an 8 to 10 inch oval with the lightly floured palms of your hands. Deflate any gas bubbles in the dough by pinching them.

Fold the dough in half lengthwise by bringing the far edge down over the near edge.

Being sure that the working surface is always lightly floured so the dough will not stick and tear, which would break the lightly coagulated gluten cloak that is being formed, seal the edges of the dough together, your hands extended, thumbs out at right angles and touching.

Roll the dough a quarter turn forward so the seal is on top.

Flatten the dough again into an oval with the palms of your hands.

Press a trench along the central length of the oval with the side of one hand.

Fold in half again lengthwise.

This time seal the edges together with the heel of one hand, and roll the dough a quarter of a turn toward you so the seal is on the bottom.

Now, by rolling the dough back and forth with the palms of your hands, you will lengthen it into a sausage shape. Start in the middle, placing your right palm on the dough, and your left palm on top of your right hand.

Roll the dough forward and backward rapidly, gradually sliding your hands towards the two ends as the dough lengthens.

Deflate any gas blisters on the surface by pinching them. Repeat the rolling movement rapidly several times until the dough is 16 inches long, or whatever length will fit on your baking sheet. During the extension rolls, keep circumference of dough as even as possible and try to start each roll with the sealed side of the dough down, twisting the rope of dough to straighten the line of seal as necessary. If seal disappears, as it sometimes does with all-purpose flour, do not worry.

Place the shaped piece of dough, sealed side up, at one end of the flour rubbed tea towel, leaving a free end of canvas 3 to 4 inches wide.

The top will crust slightly as the dough rises; it is turned over for baking so the soft, smooth underside will be uppermost.

Pinch a ridge 2 1/2 to 3 inches high in the tea towel to make a trough, and a place for the next piece. Cover dough with plastic while you are forming the rest of the loaves.

After all the pieces of dough are in place, brace the two sides of the tea towel with long rolling pins, baking sheets or books, if the dough seems very soft and wants to spread out. Cover the dough loosely with flour rubbed tea towel, and a sheet of plastic. Proceed immediately to the final rising, next step.

Place a pizza stone in your oven, and preheat it to 450ºF.
Place a cast iron pan on bottom rack and fill with 1 cup of water. 2 minutes before loaves go in.
Flip loaves onto a rice flour or corn meal coated peel or cookie sheet without sides.
Slash the baguettes with a razor or very sharp knife.
Make 3 diagonal slashes the length of the bread.
Slide loaves onto baking stone quickly to maintain the ovens temperature and steam.
Bake for 20 minutes until golden brown and interior temperature reads

Cool completely on a wire rack.
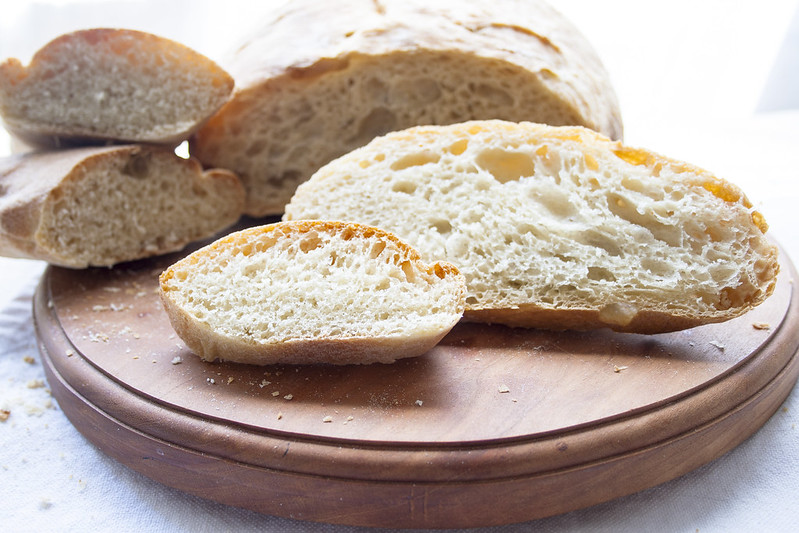


bread bake off

July 7, 2014

Soft Pretzels

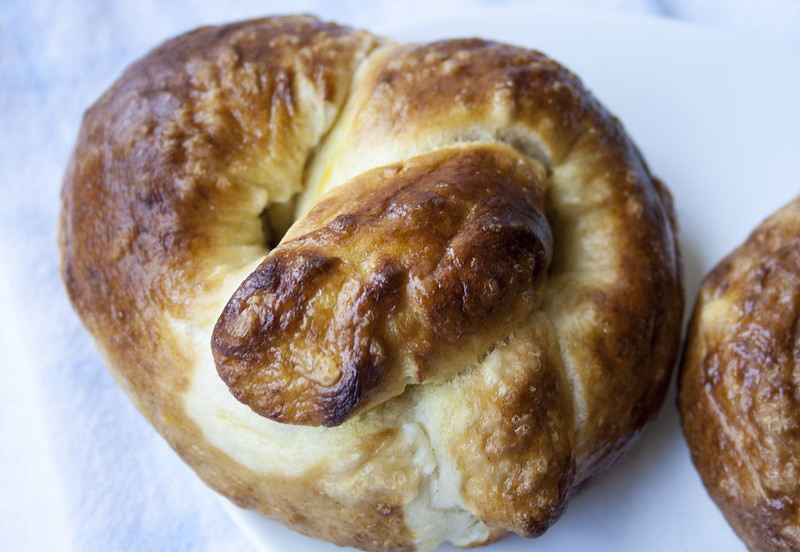
soft pretzels

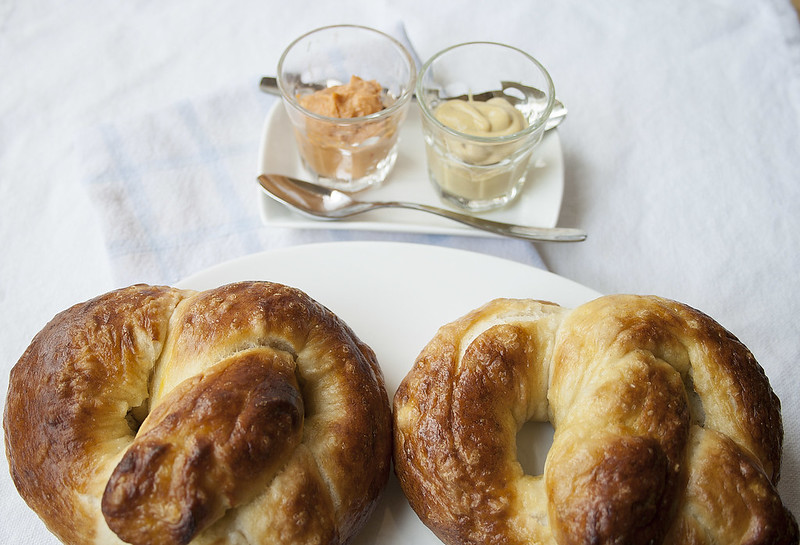
soft pretzels with mustard and red pepper hummus

I fell in love with soft pretzels when I was a teenager and saw and smelled the warm and salty pretzels being sold by vendors on the streets of New York City.  Between the drive to the train station and riding the train into the city I was always a little motion sick and the smell of the pretzels as we exited Grand Central was wonderful.  This was when New York street food was mainly hot dogs, pretzels, knishes, chestnuts, and falafel.  It was an instant love affair.  I could not wait to eat those salty treats.  I had a particular craving for salt and bread as a teenager as I could not get enough soft pretzels.  I started a tradition of making soft pretzels on the last day of school with my kids that fell away as they have grown into teenagers but my daughter no longer will let me forget and now we make them together around the last day of school.  She loves these treats especially with mustard and hummus.

Soft Pretzels

1½ cups warm water
1 tablespoon sugar
2 teaspoons kosher salt
1 package active dry yeast
4 ½ cups (22 ounces) all-purpose flour
2 ounces unsalted butter, melted
Vegetable oil, for pan
10 cups water
2/3 cup baking soda
1 large egg yolk beaten with 1 tablespoon water
Coarse salt for sprinkling

Combine the water, sugar and kosher salt in the bowl of a stand mixer and sprinkle the yeast on top. Allow to sit for 5 minutes or until the mixture begins to foam.
Add the flour and butter and, using the dough hook attachment, mix on low speed until well combined.
Change to medium speed and knead until the dough is smooth and pulls away from the side of the bowl, approximately 4 to 5 minutes.
Remove the dough from the bowl, clean the bowl and then oil it well with vegetable oil. Return the dough to the bowl, cover with plastic wrap and sit in a warm place for approximately 50 to 55 minutes or until the dough has doubled in size.

Preheat the oven to 450 degrees F. Line 2 half-sheet pans with parchment paper and lightly brush with the vegetable oil. Set aside.

Bring the 10 cups of water and the baking soda to a rolling boil in a large pot or Dutch oven.

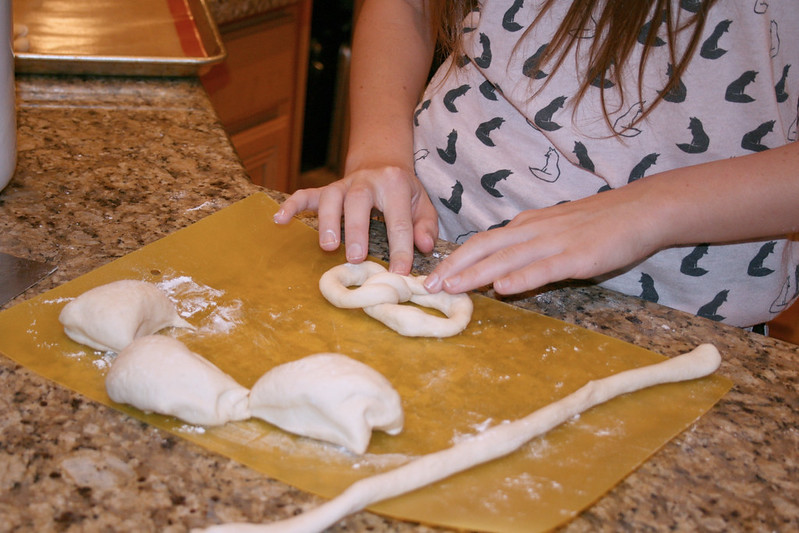
In the meantime, turn the dough out onto a slightly oiled work surface and divide into 8 equal pieces. Roll out each piece of dough into a 24-inch rope.
Make a U-shape with the rope, holding the ends of the rope, cross them over each other and press onto the bottom of the U in order to form the shape of a pretzel.
Place onto the parchment-lined sheet pan.

Place the pretzels into the boiling water, 1 by 1, (I boil two at a time) for 30 seconds. Remove them from the water using a large flat spatula.

Return to the half sheet pan, brush the top of each pretzel with the beaten egg yolk and water mixture.
Sprinkle with the salt.
Bake until dark golden brown in color, approximately 12 to 14 minutes.
Rotate pans in oven halfway through baking. 
Transfer to a cooling rack for at least 5 minutes before serving.


Adapted from Alton Brown

ace and I made pretzels
My daughter making pretzels
2006-7-11 ace
Enjoying a pretzel on the steps of the Metropolitan Museum of Art
passing clouds

February 22, 2014

Cinnamon Swirl Bread

twist

cinnamon swirl

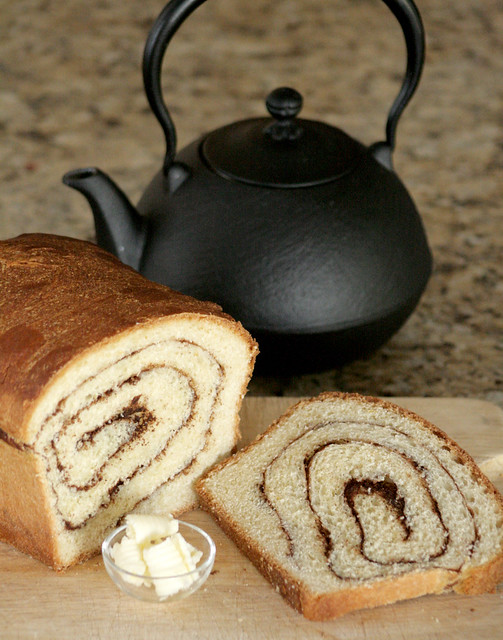
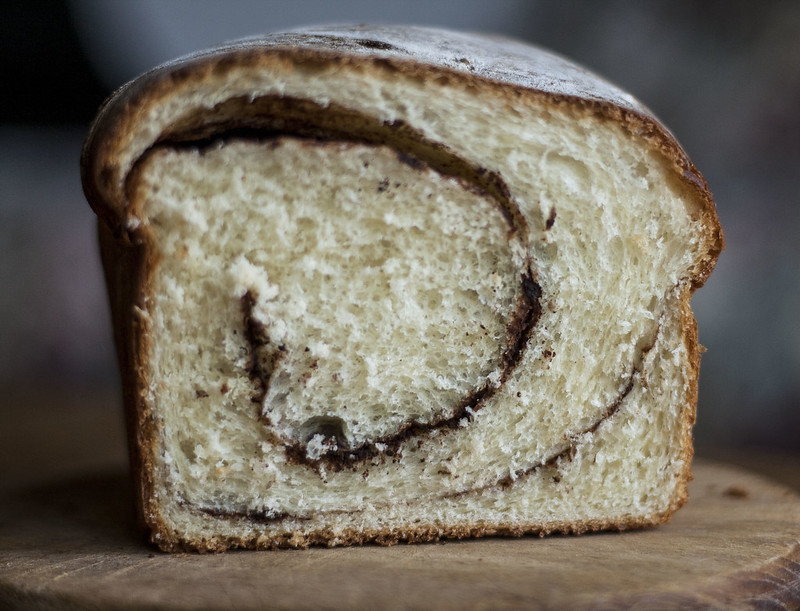
Cinnamon swirl bread is manna from the gods for a toast lover, like myself.  I have toast every single day.  I love my morning tea and toast.  This bread is delicious and smells like a cinnamon roll.  As a child, it was a real treat when my mom bought Pepperridge Farm cinnamon swirl raisin bread from the grocery store.  I wasn't too fond of the raisins but that bread was delicious.  I like to make cinnamon swirl bread every couple months to add some zest to the breakfast routine.  I have never used it in French Toast because it never lasts that long, but I have heard it is delicious that way.  Any sweet yeast dough recipe will work.

Cinnamon Swirl Bread
makes 1 loaf 

2 cups all purpose flour, plus ¾ cup extra, if needed,
¼ cup sugar
1 teaspoon salt
3 tablespoons butter, plus 2 tablespoons
1 egg at room temperature
¼ cup milk, at room temperature
¼ cup water, warm to the touch but not above 125 F
1 ½ teaspoons active dry yeast

Cinnamon Sugar Mixture

1 tablespoon sugar
2 teaspoons cinnamon
2 teaspoons unsweetened cocoa
Raisins and nuts to taste

Put all ingredients in your bread machine and operate according to manufacturer’s directions. Proceed at the *

In a stand mixer, add yeast, tepid water, and a teaspoon of the sugar.  Mix gently with paddle. Let stand for 5 minutes until yeast softens and begins to bubble.

Add flour, salt, 3 tablespoons of butter, egg, remaining sugar, and milk.
Mix with the paddle attachment until the dough comes together. At this point I knead the dough with my hands in the bowl to insure all the ingredients come together.
Switch to the dough hook and knead for 8 minutes on medium low speed.
The dough should clean the sides of the bowl but stick to the bottom.  Add additional flour 1 tablespoon at a time if too wet or add more milk if dough is shaggy and breaking apart.
The dough should form a smooth shiny ball.
*Place in an oiled bowl, rolling the dough around to coat.
Cover with plastic wrap or lint free kitchen towel and let rise in a warm place until doubled in size.

Butter an 8x4 inch loaf pan.
On a lightly floured surface, roll dough into a 10x16 inch rectangle.
Spread 2 tablespoons of butter onto the rectangle then sprinkle with the cinnamon mixture, nuts and/or raisins if using.
From the short edge of the rectangle, roll the rectangle into a log, keeping the roll snug to avoid air between the layers. 
Pinch seams and carefully place seam side down in pan tucking under each end.
Cover with buttered wax paper and put in a warm place until double in size.

Preheat oven to 375 degrees Farenheit.
Place rack in center of oven.
Remove waxed paper and bake for 40 minutes until the bread is golden brown and sounds hollow on the bottom when tapped.
During baking, if the bread becomes too dark, make a foil tent and place over bread.

Untitled

someone loves toast

February 5, 2014

Cranberry Pumpkin and Walnut Bread

pumpkin, cranberry, walnut bread

pumpkin, cranberry, walnut bread

The smell of this bread is reason enough to make it.  W
hen cut the sweet, wholesome smell wafted through the room followed by requests for a slice with sweet butter.  The cranberries are tart but somehow the tartness is balanced by the pumpkin and walnuts.  This recipe does take two days as the dough has to refrigerator for 24 hours.  The shape of the loaves was quite pleasing too. I loved how the rose so tall above the loaf pan.  Freezes well.

Cranberry-Walnut Pumpkin Loaves
 Makes 3 Small Loaves

2 2/3 to 3 cups bread flour
1 teaspoon cinnamon
1/2 teaspoon grated nutmeg
1/2 teaspoon salt
2 tablespoons tepid water (80 F to 90 F)
2 teaspoons active dry yeast
5 tablespoons unsalted butter, at room temperature
1/3 cup sugar
8 ounces (1 cup) pureed cooked pumpkin canned solid packed 
1 large egg, at room temperature
3/4 cup walnut pieces, toasted and chopped to desired texture (I like mine fine chopped)
2/3 cup cranberries (if frozen, thaw and pat dry)

Mixing and Kneading

Whisk 2 2/3 cups of the flour, the cinnamon, nutmeg, and salt together in a large bowl just to mix; set aside until needed.

Pour the water into a small bowl, sprinkle in the yeast, and whisk to blend. Allow the yeast to rest until it’s creamy, about 5 minutes.

In a mixer fitted with the paddle attachment, beat the butter and sugar at medium speed until creamy. Add the pumpkin and egg and beat until blended. Don’t be concerned if the mixture looks curdled; it will come together when you add the dry ingredients.

Set the mixer speed to low and add the yeast, then begin to add the dry ingredients, about 1/2 cup at a time.  As soon as the mixture starts to form a dough that comes together, scrape the paddle clean and switch to the dough hook.  If your dough does not come together, add a few more tablespoons of flour.

Mix and knead the dough on medium-low speed for 10 to 15 minutes, scraping the sides of the bowl and the hook now and then with a rubber spatula.  At the start, the mixture will look more like a batter than a dough, but as you continue to work, it will develop into a soft, very sticky dough that will just ball up on the hook. (This dough develops much the way a brioche does.)

With the machine on low speed, add the walnuts, mixing only until incorporated, about 1 minute. Add the cranberries and mix as little as possible to avoid crushing them.

026a


018

First Rise

Scrape the dough into a lightly buttered large bowl, cover tightly with plastic wrap, and set aside at room temperature to rise until nearly doubled in bulk, about 2 hours.

Chilling the Dough

When the dough has doubled, fold it over on itself a couple of times to deflate it, wrap it tightly in plastic, and refrigerate overnight.

Shaping the Dough

At least 6 hours before you want to begin baking, remove the dough from the refrigerator.  Leave the dough, covered in its bowl, until it reaches at least 64 F on an instant read thermometer.  (This will take as long as 3 to 4 hours–don’t rush it.) If you don’t have an instant-read thermometer, look for the dough to be slightly cool and just a little spongy.

Lightly butter three 5 3/4- by 3 1/4- by 2-inch loaf pans.

Working on a lightly floured surface, divide the dough into thirds and pat each piece of dough into a 5-by 7-inch rectangle; keep a short end facing you. Starting at the top of each rectangle, roll up the dough toward you and seal the seam by pressing it with your fingertips. Seal the ends, then place each roll, seam side down, in a prepared pan.

033


Second Rise

Cover the pans lightly with a kitchen towel and allow to rise at room temperature for 1 1/2 to 2 hours, or until the dough has nearly doubled–it will rise to just above the rim of the pans.

Baking the Bread

Center a rack in the oven and preheat the oven to 350 F.

Bake the loaves for about 35 minutes, or until deeply golden.  Remove the pans to a cooling rack; after a 5-minute rest, turn the breads out of their pans and allow them to cool to room temperature on the rack.

042a


recipe inspired by Baking with Julia by Dorie Greenspan. P 108-109. 1996.