Showing posts with label chocolate. Show all posts

January 30, 2016

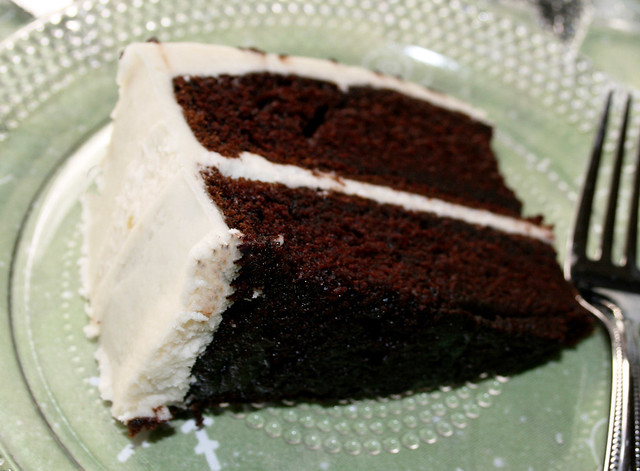
Buttermilk Chocolate Cake and My Sister's Cocoa Frosting

IMG_8320a

IMG_8309a

IMG_8293a

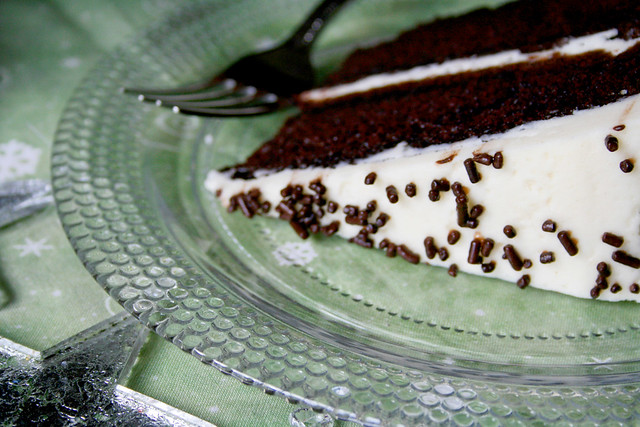
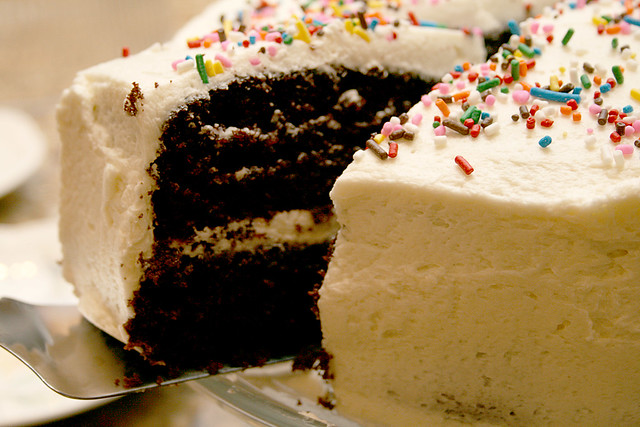
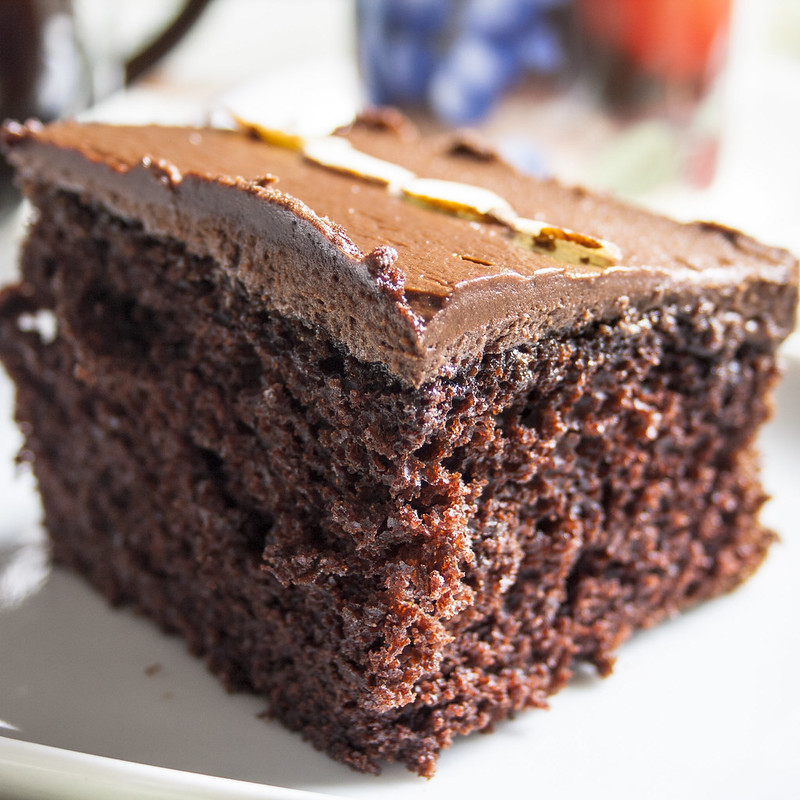
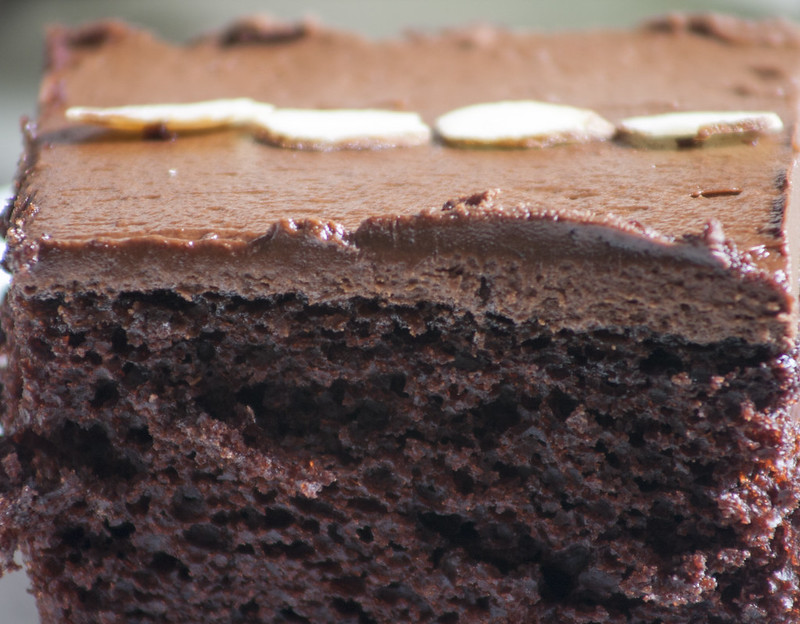
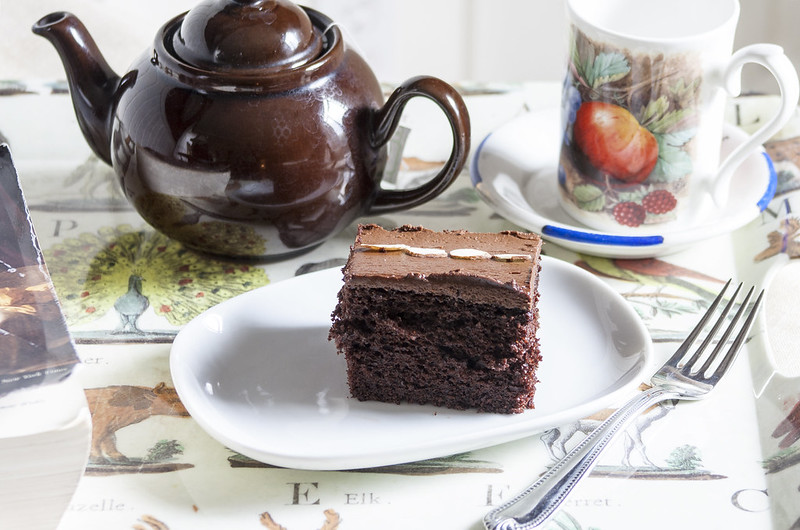
I am so grateful for chocolate cake.  Sometimes I crave chocolate cake with a rich chocolate frosting.  There was a time when I thought box chocolate cake was the best cake (my grandmother’s specialty was Duncan Hines chocolate cake baked in a sheet pan and frosted with white frosting made with Crisco and then covered liberally with festive rainbow sprinkles).  I have vastly improved my grandmother’s cake that I loved as a child.  Today, I have the benefit of a wide range of available products plus instant access to videos and thousands of recipes to compare that helps me inject the same love and care into my cakes like my grandmother.  One of my favorite recipes is my Mom’s Chocolate Cake recipe, a delicious moist, fudgy and chocolaty recipe.  This buttermilk cake has its own character -  a slight tang and tenderness from the buttermilk with full chocolate flavor especially if you use your best quality cocoa powder.  I use Ghiradelli, or Droste.  I have used Hershey’s and it a good chocolate cake, but the extra fine cocoa makes the chocolate flavor stand out.  A single layer easy cake to make is this Chocolate Fudge Cake.

My sister’s chocolate frosting is so simple yet so delicious.  The best quality cocoa powder is a real standout here.  When she makes this recipe she uses 2-3 cups of powdered sugar and 6 tablespoons of milk.  I use the 5 cups for a stiffer and sweeter frosting.

Buttermilk Chocolate Cake

1 ¾  cups all-purpose flour, plus more for pans
2 cups sugar
¾ cups best quality cocoa powder
2 teaspoons baking soda
1 teaspoon baking powder
¾ teaspoon salt
1 cup buttermilk, shaken
½ cup vegetable oil
2 large eggs, at room temperature
1 teaspoon pure vanilla extract
1 cup freshly brewed hot coffee

Preheat oven to 350ยบF.
Butter two 8-inch inch round cake pans or 1 9 x13-inch pan.
Line with parchment paper, then butter and flour the pans.

Whisk together the flour, sugar, cocoa, baking soda, baking powder, and salt in the bowl of an electric mixer.
In another bowl, combine the buttermilk, oil, eggs, and vanilla.
Using the paddle attachment, with the mixer on low speed, slowly add the wet ingredients to the dry.
With mixer still on low, add the coffee and stir just to combine, scraping the bottom of the bowl with a rubber spatula.
Pour the batter into the prepared pans and bake for 35 to 40 minutes, until a cake tester comes out clean.
Cool in the pans for 30 minutes, then turn them out onto a cooling rack and cool completely.

My Sister’s Cocoa Frosting

½ cup plus two tablespoons of softened butter
5 cups powdered sugar – my sister uses 2-3 cups
8 tablespoons of milk
3/4 cup plus 3 tablespoons unsweetened, best quality, cocoa powder
1 ¼ teaspoons vanilla

Beat butter until smooth and creamy.
Gradually add powdered sugar, milk, and vanilla.
Add cocoa powder and mix until smooth and creamy

Add additional milk or powdered sugar as needed to reach the desired spreadable consistency.

Place 1 layer, flat side up, on a flat plate or cake pedestal. With a knife or offset spatula, spread the top with frosting.
Place the second layer on top, rounded side up, and spread the frosting evenly on the top and sides of the cake.
Or frost the top of the 9 x 13-inch cake in pan or removed from pan, as desired.
IMG_8289a

March 17, 2014

Simple Chocolate Cookies

IMG_8256

IMG_8253

Simplicity is beautiful.  Sometimes I like to bake a cookie that is straightforward with standard pantry ingredients.  While I recognize the trend to layer in special ingredients to deepen and enhance flavors, I appreciate the subtle enhancements - perhaps a special cocoa powder or Tahitian vanilla.   More does not always mean better - I went to a fancy restaurant owned by a famous chef and ordered a dish that sounded delicious seasoned with rosemary, special olive oils, specific cheeses, etc. and it tasted like a rosemary branch.  Another time it was a basil extravaganza and then I thought these chefs are big names over quality and started doing my research more carefully.  Meanwhile the major food companies are flavor "blasting" with flavors boosted in a chemistry lab, frozen yogurt shops encourage one to load in sprinkles, fruit, cookies, granola and twenty other options into your bowl, and then there is the candy bars in everything trend.  If the options become overwhelming out there.  Stay home and keep it simple with these cookies. Dress these cookies up or dress them down, it is your choice.

Simple Chocolate Cookies
makes about 4 dozen

2 cups all-purpose flour
¾ cup cocoa powder
½ cup chopped chocolate or mini chocolate chips
1 teaspoon baking soda 
½  teaspoon salt
1 ¼  cups unsalted butter
2 cups sugar 
1/4 cup sugar for rolling or dipping cookie balls into (optional)
2 large eggs
2 teaspoons pure vanilla extract
1 ¼  teaspoon cinnamon

Preheat oven to 325 degrees Fahrenheit 
Whisk together the flour, cocoa powder, baking soda, and salt in a bowl, set aside.
Cream the butter and 2 cups sugar add vanilla and eggs and mix until light and fluffy.
Add dry ingredients, and mix well. 
Add chopped chocolate. 
Chill the dough in the refrigerator for 30 minutes until the cookie dough is somewhat firm.
Use a 1 tablespoon cookie dough scoop to form dough balls and then roll or dip the balls in sugar.
Bake 10 -12 minutes . 
Cool on a wire rack.  

johnny jump ups

IMG_8254

IMG_2853

Mint Chocolate Chip Cookies

IMG_8274

IMG_8292

I sometimes have a craving for mint - chocolate mint, mint tea, mint chip ice cream, chocolate mint candies, peppermints - it is so refreshing and soothing.  The combination of chocolate and mint was fated -  I am certain these two wonderful plant products could not exist side by side without some person having the idea of mixing them together.  These cookies call for mint chocolate chips which are readily available in grocery stores.  For a quick chocolate and mint fix try these cookies.

Mint Chocolate Chip Cookies
makes about 3 dozen

1 ¼ cup flour
½ teaspoons salt
1 teaspoon baking powder
cups cocoa 
½ cups butter
¼  cups sugar
½ cups brown sugar
1-½ teaspoon vanilla extract
cups milk
12 ounces mint chocolate chips

Preheat oven to 325 degrees Fahrenheit.
Whisk together flour, salt, baking powder and cocoa, and set aside.
Beat the butter on medium-high until light and then add sugars, creaming well.
Add the vanilla and beat until smooth. 
Add the flour mixture in 2 batches, alternately with the milk in one batch, mixing well. 
Stir in the mint chips.
Chill dough for at least 15 minutes. 
Scoop the dough into round tablespoon-sized balls and place onto prepared baking sheet, press down on the dough balls slightly, and bake for 10-12 minutes. 
Let the cookies cool completely on the cookie sheet, they will set up as they cool. 
Store in an air-tight container. 

IMG_8282

Untitled


bbbb - boulder by bee brook

March 3, 2014

Easy Chocolate Sauce

048a

063a

Sometimes I like to make a chocolate sauce that is rich tasting but does not involve melting chocolate because either I don't have the chocolate or I don't feel like chopping chocolate and would rather make something easy without foregoing taste.  This recipe is easily made with pantry staples - sugar, cocoa, and evaporated milk.  It is best used within the week it is made as the sugar becomes granular after a few reheats.  Also, it does not harden with the cold from the ice cream like a ganache does.  
This recipe is from my sister-in-law who uses it as frosting on spice cake, her kids favorite birthday dessert.

Easy Chocolate Sauce
makes 1 cup

1 cup sugar
5 tablespoons cocoa
2 tablespoons butter
1 small can (5 ounces) or 5/8 cup evaporated milk
1 teaspoon vanilla

Stir sugar and cocoa over low heat for 30 seconds – do not let sugar melt.
Blend in butter.
Add evaporated milk, stirring constantly.
Turn heat to medium and bring to boil stirring constantly.
Boil for 1 minute.

Remove from heat and add vanilla.


061a

lake waramaug

February 13, 2014

Marble Cheesecake

slice

IMG_4975

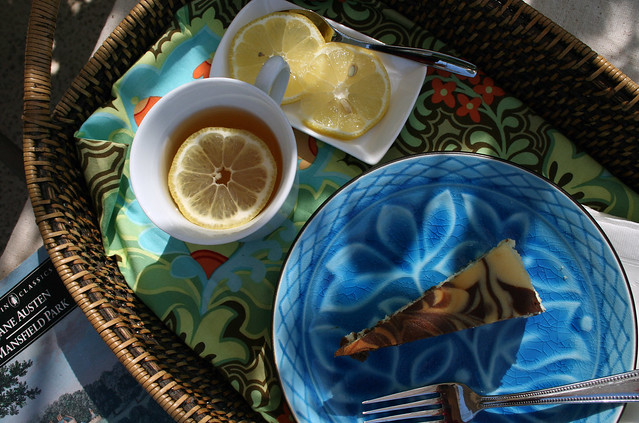
Cheesecake is a wonderful sensory experience - it is gorgeous to behold, the smell is inviting, the texture has a creamy denseness that is so satisfying.  Elegant and fancy with a history stretching back to ancient Greece, cheesecake is made from the humble workhorse - cream cheese - the variations are limited only by the imagination.  

Marble Cheesecake
makes 1 9-inch cheesecake

5 8-oz. packages cream cheese at room temperature
2 cups sugar
¼ cup all-purpose flour
¼ teaspoon salt
5 large eggs
2 egg yolks
2 teaspoons pure vanilla extract
¼ cup heavy cream
4 ounces bittersweet chocolate melted and cooled
Boiling water as needed

Crust
1 3/4 cup chocolate wafer cookie crumbs
3 tablespoons sugar
pinch of salt
4 tablespoons melted butter

Position oven rack in the middle of the oven and preheat to 350 degrees F. 
Grease a 10-inch spring-form. Wrap pan bottom with double layer of aluminum foil.
In a Cuisinart with blade inserted,  pulse cookies until they are a fine crumb, or use a rolling pin and the cookies in a zip lock bag.
Add the sugar, salt and melted butter and pulse a few more times until combined.
Dump the contents into the spring-form and pat into and even layer going halfway up the sides.
Bake for 9 minutes.

For the the Cheesecake:
Reduce oven to 325 degrees F.
Set some water to boil.
In a large mixing bowl, beat on low speed the cream cheese, sugar, flour, and salt until smooth. Add the whole eggs and egg yolks, one at a time, beating well at low speed after each addition.
Beat in the vanilla and cream.
Pour two-thirds of the batter into the spring-form pan. 
Mix the melted chocolate with the remaining batter.
Add dollops of the chocolate batter on top.  
Using a knife, create a marble pattern by dragging the knife through the cheesecake in a several circles then running the knife in straight lines to the center. 
Place the pan in a larger roasting pan. Fill the roasting pan with the boiling water until it reaches halfway up the sides of the cake pan. 
Bake until the cheesecake is firm and slightly golden on top, 35 to 45 minutes.
Remove the cheesecake from the water bath and cool to room temperature.
Refrigerate for 3 hours or until well chilled.

IMG_4971

afternoon tea


January 25, 2014

Moist Chocolate Fudge Cake

fudge cake with dark chocolate ganache fudge cake with dark chocolate ganache

If you are looking for a sweet treat that is delicious, quick, uses pantry ingredients, easy to make and looks good as well,  then this is the cake for you!  

After the holiday indulgences, I haven't been baking too much, but with the Christmas chocolates gone, the family was getting restless.  I wanted an easy recipe without too much fuss preferably 1 bowl and this cake is perfect.  It tasted even better cold from the refrigerator.

Moist Chocolate Fudge Cake
Serves 8-12

Ingredients
4-1/2 ounces (1 cup) all-purpose flour
1 ounces (1/4 cup plus 2 tablespoons) unsweetened cocoa powder
1/2 teaspoon baking soda
1/4 teaspoon table salt
4 ounces (1/2 cup) unsalted butter, melted and warm
1-1/4 cups packed light brown sugar
2 large eggs
1 teaspoon pure vanilla extract
1/2 cup hot coffee
1 cup warm Ganache (recipe below)

Directions
Preheat the oven to 350 F. 
Butter the bottom of an 8x2 or 9x2-inch round cake pan line with parchment, butter and flour.
In a small bowl, whisk the flour, cocoa powder, baking soda, and salt. 
In a large bowl, combine the melted butter and brown sugar the whisk attachment on a hand blender on low or mix with a wooden spoon or rubber spatula. 
Add the eggs and vanilla; combine until well blended. 
Add the flour mixture all at once and stir just until all the flour is moistened.
Pour the hot coffee over the batter; stir just until it’s incorporated and the batter is smooth.
It is important to not over mix 
Pour the batter into the prepared pan.
Bake until a cake tester in the center comes out clean, about 30 minutes for a 9-inch pan; 35 to 40 min. for an 8-inch pan. 
Let cool in the pan on a rack for 10 min. Run a thin knife around the edge and invert the cake (peel off the parchment if necessary). Invert it again onto the rack and let cool completely.

Once cool, set the rack over a baking sheet or foil. 
Pour the warm ganache over the cake and use an icing spatula to spread it over the top of the cake and down the sides. Let set for about an hour before serving.

Chocolate Ganache

Ingredients
8 ounces bittersweet or semisweet chocolate 
I cup heavy cream (more to thin to spreading consistency if necessary)

Directions
In a double boiler or medium sized saucepan bring water to boil.
Place chocolate and heavy cream in a metal bowl 
Lower water to a simmer and place bowl over it (the pan should not touch the water).
Stir occasionally until smooth consistency.


073

061

Recipe adapted from Fine Living Magazine

May 19, 2013

Mocha Chip Cookies

IMG_1711a

Try new things - the habits of life are both comforting and deadly - so I try new things.  I look for ways, even if they are as small as trying a new recipe.  I love my routines of having my morning tea and toast to the family meal in the evenings where we all sit, share and laugh. I love the familiarity and steady measure of the flow of daily life (even with teenagers on the scene).  Sometimes, though, my cooking becomes drudgery and I don't look forward to it so I am always searching for ways change up my baking routine.  I look for new challenges in techniques and new flavors because I tend to bake the same sweet treats every week not only because I have mastered the technique but it is quick and easy. 

When I found Milk and Honey on Flickr, I found my perfect inspiration source.  Jen is a prolific baker and chef and her mouthwatering photos and accompanying recipes are a wonderful resource and a pleasure to peruse.  Her combination of recipes range from practical feed your family recipes with a twist.  She adds that something extra that is just the right balance for children and adults alike. 

Mocha Chip Cookies
adapted from Jen at
Milk and Honey
Makes 24

1/2 cup unsalted butter at room temperature
1 1/2 cups sugar 325g if you have a scale
2 eggs
1 teaspoon vanilla
2 7/8 cups and 1 1/4 teaspoons all purpose flour or 325g if you have a scale
1/2 cup cocoa powder
2 tablespoons instant coffee powder
1 teaspoon baking soda
1/4 teaspoon salt
1/2 cup white chocolate chips
1/2 cup chocolate chips or chopped dark chocolate

Preheat oven to 350 degrees F.

Cream butter and sugar together in the bowl of an electric mixer until they are light and fluffy. Add the eggs and vanilla and beat again. Add flour, cocoa powder, coffee powder, bi-carbonate of soda and salt and mix until combined.

Fold in chocolate chips. Roll into balls and set on baking sheet.

Bake for 8-10 minutes.

Leave the to cool on the tray from about 10 minutes then place them on a wire rack to cool further or eat warm.


IMG_1670

IMG_1672

October 20, 2012

Chocolate Salted Caramel Buttons

IMG_7482


IMG_7475


Chocolate Salted Caramel Button Candies
Makes 20 depending on size of chocolate rounds

10 ounces chocolate of your preference
Fleur de Sel

Melt chocolate in  a medium bowl over a pot of simmering water.
Line a pan or plate that fits in your freezer with parchment or wax paper.
Fill a plastic bag with the corner snipped, make a parchment bag, or use an icing bag fitted with a number 4 or 5 tip.
Pipe rounds an equal number of rounds onto the parchment and place in freezer to firm up.

Caramel Filling
1/4 cup granulated sugar
2 tablespoons water
1/4 cup heavy cream

In a medium saucepan, with tall sides combine sugar and water and cook over medium-high heat.
Using a heat proof pastry brush and warm water "paint" the warm water onto any sugar that is stuck to the pan edges.  Liquefying this sugar prevents recrystallization in your finished product.
Attach a candy thermometer.
Boil without stirring until it turns a deep amber color.
Boil to just below 240F the soft ball stage - you want the caramel spreadable but not liquid.  It firms as it cools.
Watch carefully as the sugar will continue to brown after removed from the heat.
Remove from heat and slowly pour in cream (watch for sputtering) and vanilla,  whisking until it is very smooth.

Assembly
Fill rounds with caramel filling by dropping a small amount with a spoon or piping in the center of the flat side of one round then covering with the flat side of the another round creating a sandwich. Apply light pressure and the caramel will spread to the edges.
Sprinkle with fleur de sel.
Firm in the freezer.
IMG_7479

September 12, 2012

Chocolate Cream Pie

IMG_6380a

IMG_6387a


Chocolate cream pie is one of my favorite all time desserts.  The pudding filling is all at once both comforting and luxurious. One of life's little secrets is that indulgence does not have to be wildly decadent and rich but rather indulgence is also a thing of the senses, memories, and perceptions.  Can there be moderation in indulgence?   In chocolate cream pie the ingredients are as simple as chocolate, eggs, milk  but the combination reveals an indulgence in flavor, texture,  smell, and for me the many fond memories of eating chocolate pie as a child and as an adult.

My mother made chocolate cream pie at Christmas and I remember the excitement in the kitchen and the anticipation of eating it.  I now see that same happiness excitement in my own children's faces and hear it in their exclamations over this pie as I too usually make it only for holiday desserts.  They were so happy that I recently overcooked the brownies and didn't want to waste all that precious chocolate that went into the brownies and decided a chocolate brownie crust would be perfect for a chocolate cream pie.
Chocolate Cream Pie

Crust
1 1/3 cups cookie or  graham cracker crumbs, or a traditional pate brise works well too.
Note:  I overcooked a batch of brownies so I ground them up and used the brownie crumbs which was rendered a tender but firm crust with a slight chew.
5 tablespoons unsalted butter, melted
1/4 cup sugar

Put oven rack in middle position and preheat oven to 350°F. 
Smash cookies in a sealed plastic bag or pulse in a food processor. 
Stir together crumbs, butter, and sugar and press on bottom and up side of a 9-inch pie plate.
Bake until crisp, about 15 minutes, and cool on a rack.

Chocolate Filling
2/3 cup sugar scant
1/4 cup cornstarch
1/2 teaspoon salt
4 large egg yolks
3 cups whole milk
7 oz fine-quality bittersweet chocolate, melted
Note:  How the chocolate tastes off the bar is how it will taste in the pie so go with your taste preferences.  If you prefer a 90% cacao chocolate expect your pie to have that edgy less sweet flavor. I used Shaferbergen with its delicious mellow, buttery, and super chocolaty flavor.
2 tablespoons butter, softened
1 teaspoon vanilla

Melt chocolate over a double boiler.
In a small bowl, lightly stir yolks to break and set near stove.
Whisk together sugar, cornstarch,  and salt, in a 3-quart heavy saucepan until combined well, then add milk in a stream, whisking.
Bring to a simmer (steam begins to rise) and remove from heat.
Add a small amount of the hot milk mixture to the yolks stirring constantly.  Keep adding hot liquid to the yolks until tempered, usually three additions.
Whisk the tempered yolk mixture into the saucepan.
Over moderate heat bring boil, whisking, then reduce heat and simmer, whisking, 1 minute (filling will be thick and leave a valley on the back of spoon if you dip a spoon in the pudding and draw a line down the spoon, the pudding should stay on either side of each line.
Force filling through a fine-mesh sieve  into a bowl (never skip this part and then serve the pie at a party!)
Stir in chocolate, butter, and vanilla.
Cover surface of filling with a buttered round of wax paper and cool completely, about 2 hours.

Spoon filling into crust and chill pie, loosely covered, at least 6 hours.

Whipped Cream
3/4 cup chilled heavy cream
1 tablespoon powdered sugar
1/2 teaspoon vanilla

Just before serving, beat cream with sugar in a bowl using an electric mixer until it just holds stiff peaks.
Add vanilla and mix in.
Spoon on top of pie or individual slices as desired.

IMG_6384a

Bittersweet Chocolate


Chocolate Cream Pie
Chocolate Cream Pie with a Graham Cracker Crust


July 9, 2012

My Mom's Moist Chocolate Cake

IMG_3563

chocolate cake and coffee

    The first time my Mom made this cake for me was after I had my second child.  After the long hours of acting as my labor coach, taking care of my toddler, making meals, jumping up every time the baby cried during the night making sure I was okay or if I needed help, doing the long walks and patting the baby if baby was not to be consoled; my Mom decided she needed to make a delicious cake for me.   She called back home to my father and had him recite the recipe (I can hear her talking to my father even after these many years directing him to the recipe's location and telling him what kind of paper it was written on).  She was so kind and generous with her time and care. Her help speed up my recovery and she surrounded my family with love.    
   I make this cake often.  It is used for at least one birthday during the year.  The cake is moist, chocolaty, and you don't need expensive ingredients to have a delicious dessert, though you can use that special cocoa powder if desired. It is a good go-to cake and when anyone gets a craving for chocolate cake with vanilla frosting, this is the cake.  The frosting is different - I have not found a similar recipe that uses a flour and milk base like it.  The consistency is similar to whipped cream but heavier and not too sweet.

My Mom's Moist Chocolate Cake
Makes 2  eight or nine inch round cakes or 13x9 inch baking pan

2 cups all purpose flour
1 teaspoon salt
2 teaspoons baking soda
1 teaspoon of baking powder
3/4 cup unsweetened cocoa
2 cups granulated sugar
1 cup oil (of your choice of a mild or neutral flavored oil)
1 cup hot coffee
1 cup milk
2 eggs
1 teaspoon vanilla extract

Preheat oven to 325 degrees Fahrenheit.
Butter and flour baking pans.
In the bowl of stand mixer whisk together flour, salt, baking soda, baking powder, cocoa and sugar.
Add oil, coffee and milk and mix at medium speed for 2 minutes.
Add eggs and vanilla and beat for 2 more minutes (batter will be thin).
Pour into pans and bake for 25-30 minutes until a cake tester inserted into the center is crumb free.

Cool cakes 15 minutes before removing from pans. 
Cool completely before frosting.  I sometimes speed cool for 15 minutes or so in the freezer.

IMG_3559

milk and flour based vanilla frosting

Favorite Vanilla Frosting

1 cup milk
5 tablespoons all purpose flour
1 cup softened butter (or use ½ cup of butter and ½ cup shortening)
1 cup sugar
1 teaspoon vanilla

Combine milk and flour in a medium saucepan and cook until thick, whisking out lumps.
Cover and refrigerator for 2 hours or until cold.
In large mixing bowl, beat butter, sugar and vanilla until creamy.
Add chilled milk and flour mixture and beat for 10 minutes.
Frost the cake.


Frosting will cover a two layer cake and generously cover a sheet cake style cake.

the family's request   365:7

March 8, 2011

Chocolate Thumbprint Cookies

chocolate thumbprint cookies

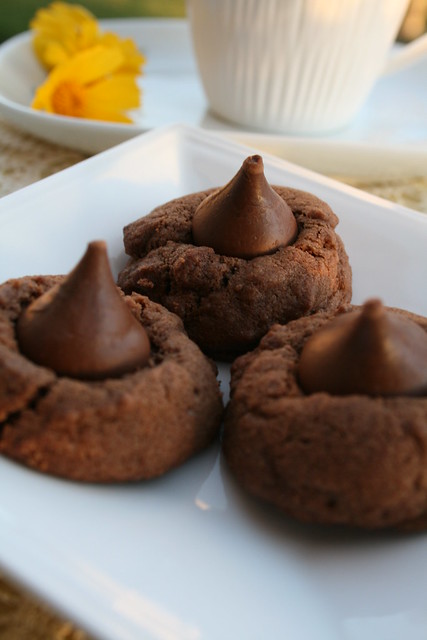
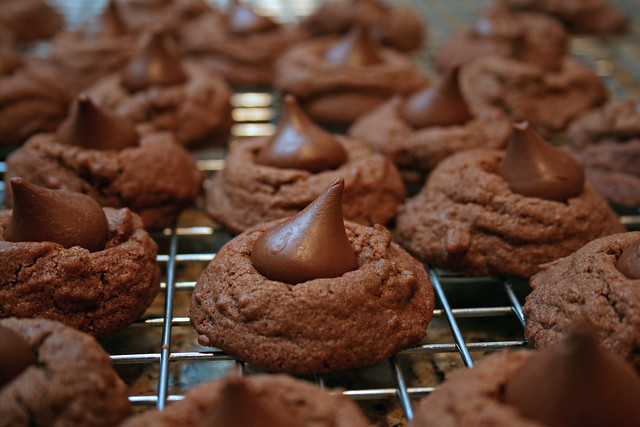
Chocolate kiss cookies are a special cookie not only because their butter and chocolate base but the chocolate kiss candy pressed into the cookie when they are hot out of the oven.  The chocolate kiss melts and mingles with the cookie creating a fudge like quality.  I always make these cookies for my Christmas cookie trays but I do make them occasionally throughout the year when the family is craving chocolate.  When I start unwrapping the kisses, smiles light up my family’s faces.   . 

Chocolate Thumbprint Cookies
makes 36 cookies

2/3 cup butter
½  cup sugar
¼  cup unsweetened cocoa powder
¼  teaspoon baking soda
1/8 teaspoon salt
1 egg
1 teaspoon vanilla
1 ¼  cups all purpose unbleached flour
3/4 cup chocolate or multi-colored sprinkles - if desired
36 chocolate kisses unwrapped

Cream butter and sugar in a large mixing bowl with electric mixer on medium speed. 
Scrape bowl.
Beat in egg and vanilla until combined.
Add flour, cocoa powder, baking soda, and salt, beat until combined scraping sides with machine on low.
Chill dough for 30 minutes, or until easy to handle.
Preheat oven to 375°F
Scoop dough with a small cookie scoop or shape into 1 inch balls, roll in sprinkles if using and place on a parchment lined sheet pan 2 inches apart.
Bake for 6-8 minutes depending on your oven.
Remove from oven and immediately press a chocolate kiss into each cookie.

Transfer to wire racks.

chocolate thumbprint cookies

teany tea

Untitled

snow dusted

Untitled

January 27, 2010

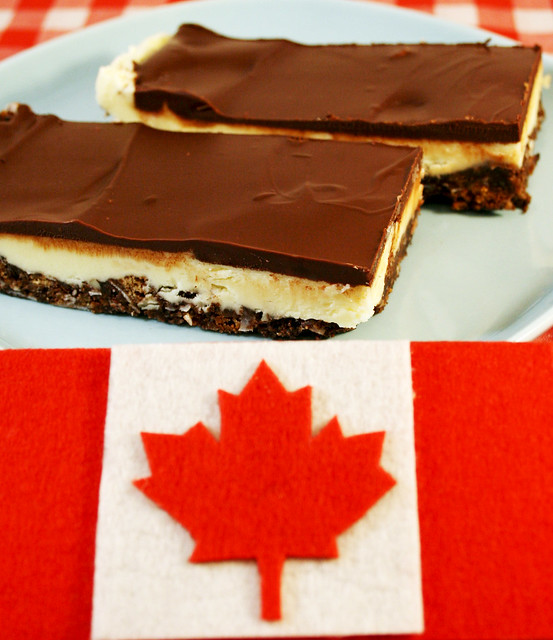
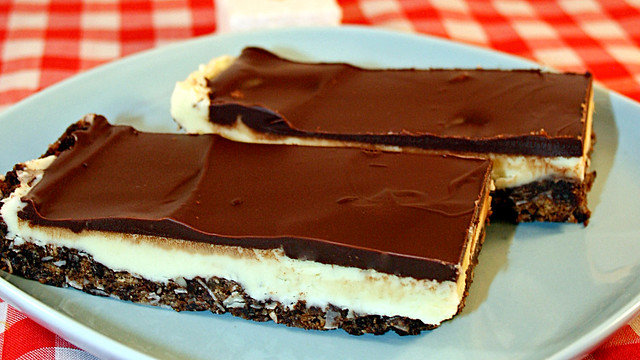
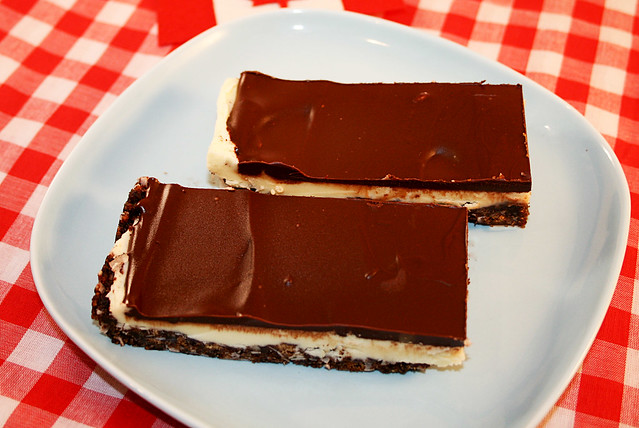
Nanaimo Bars

Nanaimo Bars Daring Bakers' January Challange

Nanaimo Bars

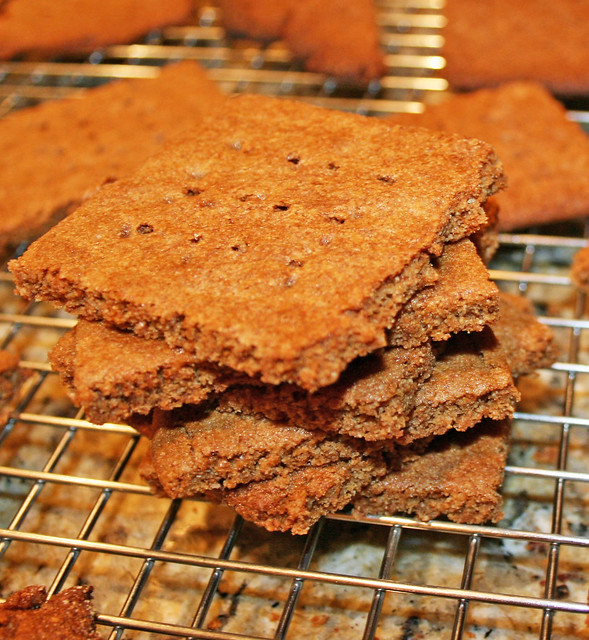
    This year's Daring Baker challenge begins with a celebration of Canada and the upcoming Winter Olympics.  We made a popular no-bake bar style cookie in Canada called the Nanaimo Bar named for the city of Nanaimo in British Colombia.  While the bar is popular for its no-bake feature, the Daring Bakers did have to do some baking!  Actually, the best part of the challenge was the homemade graham crackers because I have wanted to make homemade graham crackers for quite some time.  I chose to make my graham crackers with graham wheat flour.  When my own children were small, the graham cracker is an easy snack to give.  For a long while I used the widely popular supermarket graham crackers then becoming more aware of ingredients I switched to Trader Joe's brand which were okay.  Annie's Bunny Grahams were a favorite but they can be spendy and come in such small quantities. Lucky me, I now am happy to have a tasty graham cracker recipe in my recipe file.
    The Nainaimo bar somehow reminds me of a Magic Bar (Seven Layer Bar) except the Nainamo Bars have this center of frosting (I used pudding mix and I think maybe if I had used the custard powder it might have been creamier and more custardy).
Give this recipe a try especially if you need a dessert in hurry. If you don't make graham crackers the recipe goes quite quickly.

Nanaimo Bars
Preparation time
• Graham Wafers: 30 to 45 minutes total active prep, 2 ½ hours to overnight and 45 minutes inactive prep.
• Nanaimo Bars: 30 minutes.

For Nanaimo Bars — Bottom Layer
1/2 cup (115 g) (4 ounces) unsalted butter
1/4 cup (50 g) (1.8 ounces) granulated sugar
5 tablespoons (75 mL) unsweetened cocoa
1 large egg, beaten
1 1/4 cups (300 mL) (160 g) (5.6 ounces) whole wheat graham wafer crumbs (recipe follows)
1/2 cup (55 g) (1.9 ounces) almonds (any type, finely chopped)
1 cup (130 g) (4.5 ounces) coconut (shredded, sweetened or unsweetened)

For Nanaimo Bars — Middle Layer
1/2 cup (115 g) (4 ounces)unsalted butter
2 tablespoons and 2 teaspoons (40 mL) heavy cream
2 tablespoons (30 mL) vanilla custard powder (Such as Bird’s. Vanilla pudding mix may be substituted.)
2 cups (254 g) (8.9 ounces) icing sugar

For Nanaimo Bars — Top Layer
4 ounces (115 g) semi-sweet chocolate
2 tablespoons (28 g) (1 ounce) unsalted butter

Bottom Layer:  Melt unsalted butter, sugar and cocoa in top of a double boiler. Add egg and stir to cook and thicken. Remove from heat. Stir in crumbs, nuts and coconut. Press firmly into an ungreased 8 by 8 inch pan.
Middle Layer:  Cream butter, cream, custard powder, and icing sugar together well. Beat until light in colour. Spread over bottom layer.
Top Layer:  Melt chocolate and unsalted butter over low heat. Cool. Once cool, pour over middle layer and chill.
Freezes well.

IMG_3708

Whole Wheat Graham Wafers

2 ½ cups plus 2 tbsp of all-purpose wheat flour, or wheat pastry flour.
1 cup (200 g) (7.1 ounces) dark brown sugar, lightly packed
1 teaspoon (5 mL) baking soda
3/4 teaspoon (4 mL ) kosher Salt
7 tablespoons (100 g) (3 ½ ounces) unsalted butter (cut into 1-inch cubes and frozen)
1/3 cup (80 mL) honey, mild-flavoured such as clover.
5 tablespoons (75 mL) whole milk
2 tablespoons (30 mL) pure vanilla extract

In the bowl of a food processor fitted with a steel blade, combine the flour, brown sugar, baking soda, and salt. Pulse on low to incorporate. 
Add the butter and pulse on and off, until the mixture is the consistency of a coarse meal. 
If making by hand, combine aforementioned dry ingredients with a whisk, then cut in butter until you have a coarse meal with no chunks of butter should be visible.
In a small bowl or liquid measuring cup, whisk together the honey, milk and vanilla. 
Add to the flour mixture until the dough barely comes together. 
It will be very soft and sticky.
Turn the dough onto a well-floured surface and pat the dough into a rectangle about 1 inch thick. 
Wrap in plastic and chill until firm, about 2 hours, or overnight or put in the freezer for 30 minutes - your dough may be ready to handle without any chilling.
Divide the dough in half and roll the dough into a long rectangle, about 1/8 inch thick. 
Cut into 4 by 4 inch squares. 
Gather the scraps together and set aside. 
Place wafers on one or two parchment-lined baking sheets. Chill until firm, if necessary about 30 to 45 minutes
Repeat with the second batch of dough.
Adjust the rack to the upper and lower positions and preheat oven to 350 degrees Fahrenheit (180 degrees Celsius).
Gather the scraps together into a ball, chill until firm, and reroll. 
Prick the wafers with toothpick or fork, not all the way through, in two or more rows.
Bake for 12-14 minutes, until browned and slightly firm to the touch, rotating sheets halfway through to ensure even baking. 
When cooled completely, place enough wafers in food processor to make 1 ¼ cups (300 mL) of crumbs. Another way to do this is to place in a large ziploc bag, force all air out and smash with a rolling pin until wafers are crumbs.

If you wish to make gluten free - use this flour combination and chill dough well:
1 cup (138 g) (4.9 ounces) sweet rice flour (also known as glutinous rice flour)
3/4 cup (100 g) (3.5 ounces) tapioca starch/flour
1/2 cup (65 g) (2.3 ounces) sorghum flour

The January 2010 Daring Bakers’ challenge was hosted by Lauren of Celiac Teen. Lauren chose Gluten-Free Graham Wafers and Nanaimo Bars as the challenge for the month. The sources she based her recipe on are 101 Cookbooks and http://www.nanaimo.ca/.

Canadian Dessert - Nanaimo Bars

Untitled