Showing posts with label main dish. Show all posts

April 13, 2014

Italian Style Meatballs

021

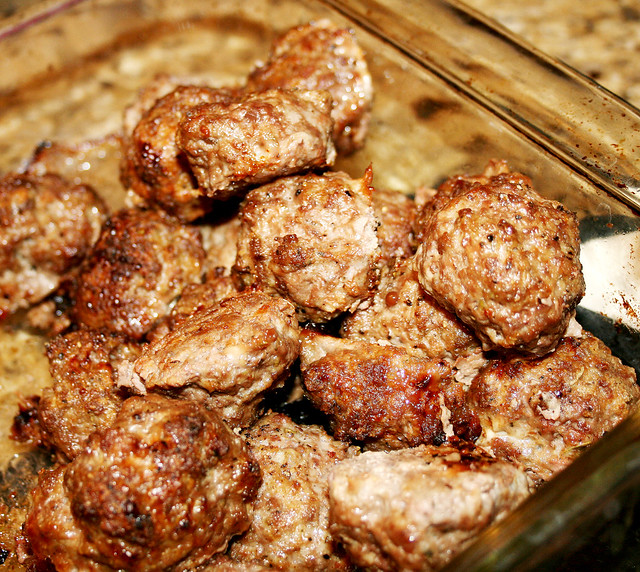
    Meatballs are the kind of food that brings happiness.  Daily I am asked “What’s for dinner?” and when I reply meatballs and…….it doesn’t matter what the second part is -- the questioner is instantly happy on the word meatballs – “yummmm.” 
    As a child, commercially pressed hamburgers were more common than hand formed meatballs.  Meatballs were part of our special homemade spaghetti sauce dinners where the sauce bubbled all day on the stove top.  Dad would fry them on the stove top versus baking in the oven. My sister reminded me of our father’s perfectly shaped meatballs and his penchant for frying the meatballs, as with many things he cooked, on high and the grease spattering. 
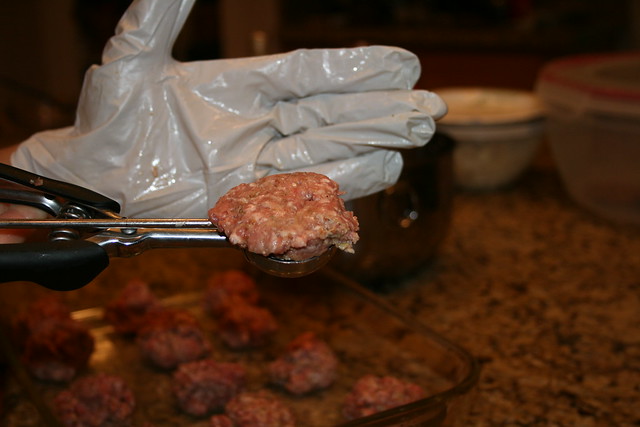
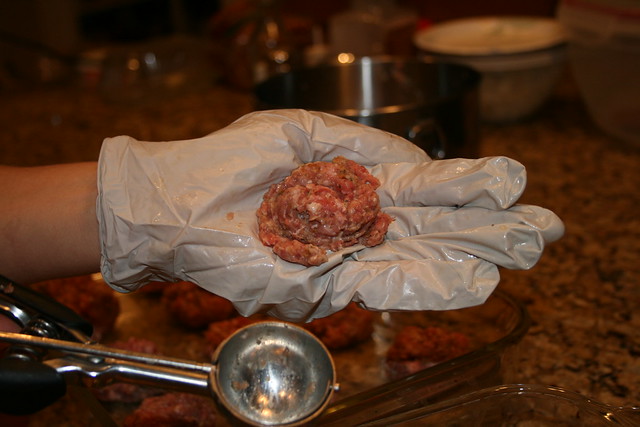
     While I love a tasty meatball, I do not favor all the handwork involved so I have a method that reduces the hand rolling time by using my graduated size cookie scoop to begin the molding process.  I have three sizes of scoops and I most often use the 1 ½ tablespoon middle size but sometimes I like the small (2 teaspoons) size for fun marble size meatballs and rarely do I make the larger size.
     Meatball recipes have many variations – my ideal Italian style meatball is moist, mildly spiced, and compliments mainly a red sauce and must be cooked in the oven.   

Meatballs
Makes around 20 meatballs

1 pound of ground beef
2/3 cup of shredded Parmesan cheese
1/3 cup of fresh bread crumbs
¼ cup milk
1/3 cup of finely chopped onions (optional)
1 celery stick finely chopped (optional)
Chopped fresh parsley (optional)
1 teaspoon Italian blend spices or spice mix of your choice – basil is nice
1 egg slightly beaten
Salt and pepper

Preheat oven to 400 F°.
Combine the ingredients with your hands being careful not to overmix.
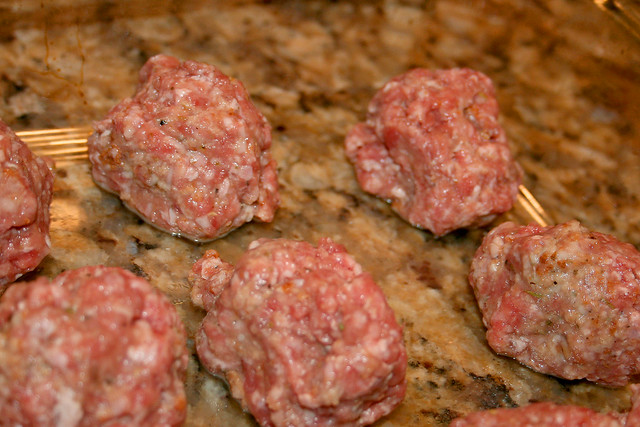
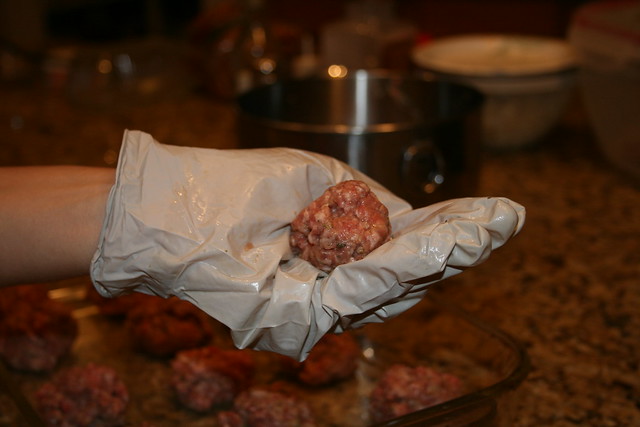
Shape into walnut size or larger balls.
Place in baking dish.
Bake for 20 minutes or until done. 

Loosen meatballs and drain off accumulated oil.  

Serve with spaghetti and red sauce:
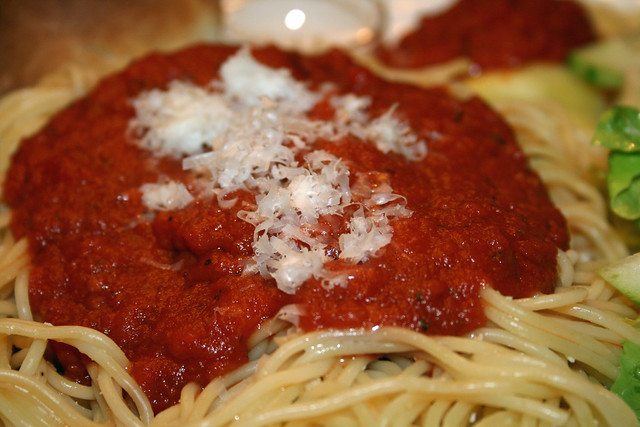
quick and easy red sauce

011

016

013

014

7983326849_785f16db99_oaa
My sister's photo from Northern Italy - a view she saw eating lasagne from a cafe in Brunate.

April 1, 2014

Beer Can Chicken

034a

the waterfall

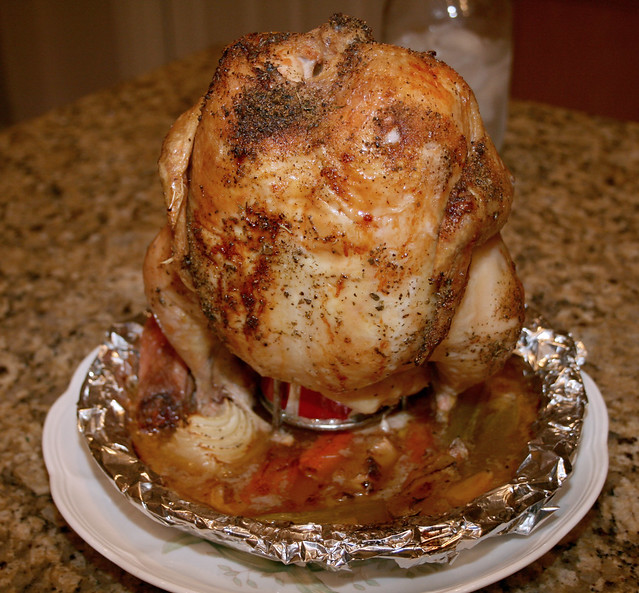
One of my favorite ways to roast chicken is on the grill with the chicken poked onto a beer can.  Beer can chicken makes a wonderfully moist and delicious chicken every time without the need for a spit or rotisserie. I always associate a roasted chicken dinner with taking time and being a special dinner.  The smell of roasted chicken evokes thoughts of comfort, warmth and caring.  When a chicken is roasting I often hear “it smells so good!” It is little wonder that grocery stores churn out hundreds of rotisserie chickens every day and are at their peak smelling point when the work day is done. By making beer can chicken at home you can control your flavor profile and have a delicious home cooked meal to share with your family and friends.

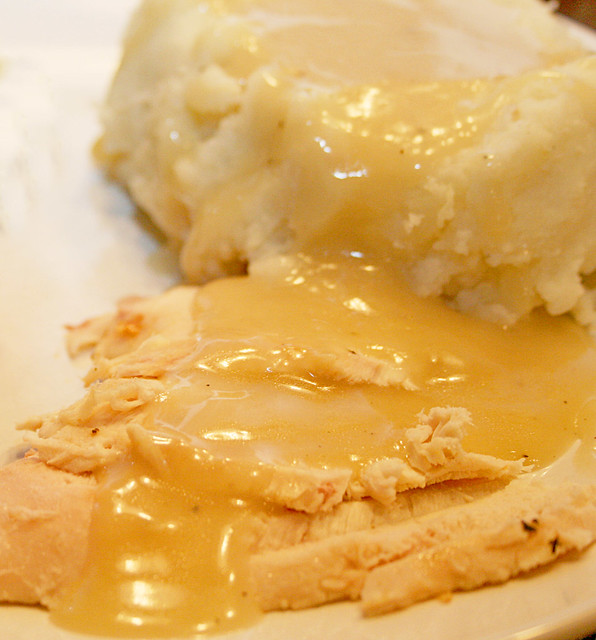
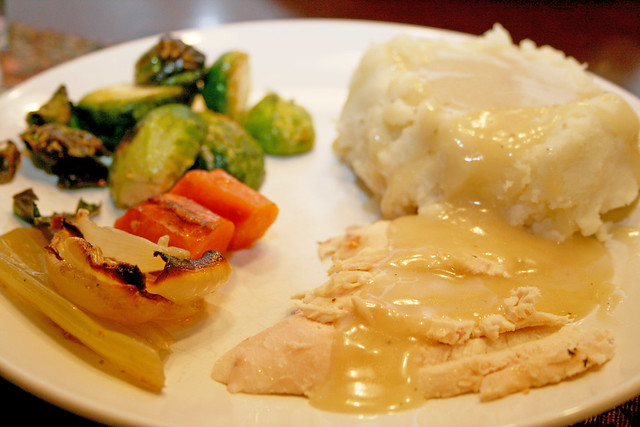
Part 1 of 3 of the Chicken that Keeps on Giving

Beer Can Chicken

1 roasting chicken - about 5 pounds
2 carrots peeled and chopped into pieces
1 stalk of celery chopped in medium pieces
1 small onion quartered
3 to 4 garlic cloves peeled and left whole
1 cup chicken stock, approximately
1 tablespoon oil of your preference
½ teaspoon sage
½ teaspoon thyme
¼ teaspoon paprika*
Salt and Pepper

Preheat grill with a lid that can accommodate an upright chicken – gas, charcoal, or smoker. I use a gas grill.
Place beer can chicken holder in a 9-inch foil pan.
Scatter the chopped vegetables across the bottom of the foil pan and holder.
Rinse chicken and pat dry.
Empty about half of the beer out of can and widen the opening.
Put beer can in the holder and place chicken on top, legs down and inserting can into the chicken cavity.
Brush chicken with oil and sprinkle with spices, salt and pepper over the entire skin surface. I do this with the chicken on the stand.
Tuck in wings.
Place chicken on the grill.
Turn the burner to low that the chicken is over and lower the other side to medium high. 
Add the chicken broth to pan a little over halfway up leaving room for drippings.
Cook until an instant read thermometer reads 165°F about 1 to 1 ½ hours. 
Depending on your grill you may turn off the burner under the chicken.  Mine goes low enough. 
Remove chicken to plate without spilling the beer in the pan juices or splashing onto the chicken unless you want that flavor in you final product.

*Other spice combinations:
rosemary and lemon zest
granulated garlic and oregano
savory and garlic

any barbecue rub

IMG_8554a

March 14, 2014

Chicken Fried Steak with Milk Gravy

029a

    My husband's mother has deep roots in West Texas, and he loves Texas style food.  He enjoys that stick to your ribs and stomach filling quality.  While his mom did not prepare those kinds of food for him as she had had enough fried foods as a child and teenager, preferring a simpler dinner of tacos and chili. She says she thought there was only milk gravy until she married and learned otherwise.   
    My husband’s grandmother, Tommie's method of cooking was to fry.  Tommie grew up on a ranch in West Texas watching her mother and grandmother cooking on wood fired stoves.  My mother-in-law remembers her grandmother getting up every morning and starting the fire and making biscuits and gravy without fail.  They would eat a large breakfast and Grandpa would take biscuits wrapped in a handkerchief with him for lunch while he was out working on the ranch. 
     My husband received from his grandmother a cast iron pan with this recipe for milk gravy taped inside for Christmas one year.  It is a real treasure to have her handwritten recipe, and the square cast iron pan is my favorite to bake biscuits in.


87656-PH-42-005
Great-grandfather, Tommie, mother-in-law at the ranch house where daily biscuits and gravy were made.
Chicken Fried Steak with Milk Gravy

4 cube steaks
¾ cup flour
¾ cup panko or white bread crumbs dried or fresh
Dash of cayenne if desired
1 teaspoon salt
1 teaspoon pepper
1 egg
½ cup milk
Additional ½ cup plus more, if needed, for dredging meat
Oil for frying.

In a shallow dish or a plastic bag, mix flour, panko or bread crumbs, cayenne, salt and pepper.
In a shallow bowl, whip egg and milk together.
On a separate plate put ½ cup of plain flour.
Dredge cube steak in plain flour, covering both sides, shaking off excess flour.
Put the floured cube steak in the egg bath, careful not to make too soggy, let excess egg mixture drip off.
Coat cube steak with the flour and panko mixture, making sure it is covered well.
Repeat with all the steaks, adding more flour as needed.
Heat a large heavy duty skillet over medium high heat and add ¼ to ½ cup oil.  Heat to very hot.  Fry each cube steak until golden brown of each side over a high heat (if you fry with lower heat, the meat and coating becomes very greasy).
Remove the cube steaks carefully with a thin metal spatula so not to tear off the coating.
Transfer to a sheet pan and place in a 300 degree Fahrenheit oven until the gravy is done.

Milk Gravy

2 cups of milk
2 ½ tablespoons of oil
2 heaping tablespoons of flour
Salt and pepper to taste

After the meat is done, drain off excess oil leaving 2 ½ tablespoons of oil. 
Heat pan over medium heat, and add flour and mix together with the oil forming a roux.
Brown roux stirring up brown bits as you stir.
Slowly whisk in milk stirring constantly while mixture thickens. 
Bring to a boil and boil gently for 1 minute, stirring constantly.
Add more milk if too thick.
Remove from heat.

The milk gravy thickens as it stands. Whisk in more milk over medium heat until the desired consistency is reached.

Biscuit Recipe


069a

027a

024a

87656-PH-1800-008
Ranch house on rocks
87656-PH-1800-006
Ranch Living

87656-PH-1800-007


February 18, 2014

Meatloaf

Meatloaf, Baked Mac & Cheese, Acorn Squash and Salad

152a
I love meatloaf!  I have had and made some dry meatloaf.  This recipe is moist and delicious. I especially like meatloaf the next day sliced with mustard for a sandwich.  People who have an aversion to meatloaf have said this is good meatloaf.  There are a few steps but they are worth it.  Remember don't overwork the meat when mixing.

MEAT LOAF  
makes 2 small loaves

Glaze
1/2 cup ketchup or chili sauce
2 tablespoons brown sugar
2 teaspoons cider vinegar or white vinegar

Meat Loaf
I1 tablespoon vegetable oil
1 onion, chopped fine
2 garlic cloves, minced
1/2 teaspoon dried thyme
2 large eggs
1/2 cup milk, plus extra as needed
2 teaspoons Dijon mustard
2 teaspoons Worcestershire sauce
1/4 teaspoon hot pepper sauce
1 teaspoon salt
1/2 teaspoon pepper
2 pounds ground beef
2/3 cup fresh breadcrumbs
1/3 cup finely chopped parsley

Adjust the oven rack to the middle position, and preheat to 350 degrees. Line a baking sheet with aluminum foil, and set aside. Heat the oil in an 8-inch nonstick skillet over medium-high heat until shimmering. Add the onion and cook until softened, about 5 minutes. Stir in the garlic and thyme and cook until fragrant, about 15 seconds. Set aside to cool for 5 minutes.

146

Meanwhile, mix together the ketchup, brown sugar, and vinegar and set aside.
In a separate bowl, mix the eggs, milk, mustard, Worcestershire, salt, pepper and Tabasco together.
Mix the meatloaf mix, bread crumbs, parsley, sautéed onion mixture, and egg mixture until evenly blended and the mixture doesn’t stick to the bowl (if the mixture sticks, add additional milk, a tablespoon at a time, until it no longer sticks).

143

Turn the meat mixture onto the foil-lined baking sheet and shape into a 9 by 5-inch loaf. Brush with half of the ketchup mixture. Bake the loaf for 45 minutes. Freezer-friendly variation: I divided the mixture into two smaller loaves, and brushed each loaf with about one-fourth of the ketchup mixture instead.

149

Bake until the center of the loaf measures 160 degrees on an instant-read thermometer, about 15 minutes. Let cool for 20 minutes before slicing and serving.

Untitled

Meatloaf baked outside of the loaf pan.

September 25, 2012

Ricotta Cheese

IMG_6886

IMG_7427

My family husband is not a big fan of ricotta cheese and its grainy texture which comes from the industry's cost effective standard of adding gums and carrageenan thickeners instead of the time consuming separating the whey from the cheese.  After a little research I discovered that ricotta could be made at home without the addition of rennet, citric acid, lipase or the use of any other special cheese making equipment other than cheese cloth.  I was inspired by a lasagna my sister ate while traveling in Italy.  It wasn't the lasagna I grew up on where the portion is thick with layers of ricotta, sauce, meat and noodles which I do like but it is an all day affair to make the giant American version of lasgna.

Craving lasgna after I saw my sweet sister's delicious photo, I decided to make the ricotta cheese and use it on a quickly composed lasagna for dinner.  We spread the leftover ricotta on crackers, bagels and toast later in the week.  Its consistency was like cream cheese and it was very mild in flavor.  I imagine that the flavor would be more robust if local milk, goats milk, or raw milk were used in the recipe.  For me, it felt like a real accomplishment making homemade cheese even if it was so easy to make.

Ricotta Cheese
Makes 4 cups
1 gallon whole milk
1/8 teaspoon salt
¾ cup fresh lemon juice

Pour the milk into a large, nonreactive pot and season with salt.
Heat the milk to 190º (use a candy thermometer), stirring it every few minutes to keep it from scorching on the bottom.
Turn off the heat and add the lemon juice. Stir slowly until you see curds beginning to form. (The curds form quickly after the addition of lemon juice).
Let the pot of curds and whey sit undisturbed for 5 minutes.
Double line a colander with cheesecloth and place it over another bowl to catch the whey.
Pour the curds and whey into the colander and let the curds strain for at least an hour,
then discard the whey.
Store in an airtight container and refrigerate until ready to use.


IMG_6885

IMG_7444
I served a little extra ricotta on the side - yum.

Untitled
The Inspiration - My sister's lasagna in Northern Italy

IMG_6881
Heat milk to 190F

IMG_6898
I hung my cheese as it still seemed wet after the 1 hour in the strainer. 
IMG_7445

IMG_6947

January 26, 2010

Chicken Enchiladas with Easy Homemade Enchilada Sauce

IMG_1995

chicken enchiladas

I love Mexican food but I am particular about it. I don't like it too greasy or too hot. Heat is good but it does not substitute flavor. Living in the Sonoran desert our local Mexican food is the standard fare that a cattle ranching population of people could survive on like refried beans, red rice, various burros with chunky red or green chili beef, tacos, queso fundito, menudo, sopapillas etc. I am trying to move away from the "junior league" style recipes where a can of soup is added for flavor and ease of preparation but those cans of condensed soup are filled with ingredients I am no longer feeding to my family. I am trying to capture pure, simple and delicious flavor.

Chicken Enchiladas
Serves a family of 4
Preheat Oven to 375F

1-2lbs of (about 3 cups) of shredded chicken (I grill or oven roast bone-in chicken breast with a light seasoning of salt, pepper, garlic powder and cumin).
1 to 2 fresh or canned jalapenos chopped fine (I always chop with gloves)
1 pasilla or hatch or poblano (whatever your market has - watch for the super hot chilies) chopped fine
1/2 cup fresh chopped cilantro
1 onion chopped fine
1 tsp cumin optional
1 tsp salt
Note: sometimes I do a quick saute of onions and chili peppers in a bit of oil to soften adding the cumin in at the end for about 30 seconds
1lb (16oz) cheese (sharp, medium, or monterey mix)
3-4 cups enchilada sauce (recipe follows)
12 corn tortillas

Combine 3 cups of cheese and about 3/4 of a cup to 1 cup of the enchilada sauce with the chicken, chilies, onions, cilantro, spices, taste for salt and pepper. I like my mixture moist so I adjust with the enchilada sauce.

Heat a small amount of oil in a saute pan and heat and run each tortilla through the oil stacking on a papertowel lined plate. Or to cut the extra fat wrap the stack of corn tortillas in a wet paper towel and heat in the microwave for 30 seconds until they are bendable

Prepare baking dish by spreading about a 1/2 cup of sauce on the bottom of the pan.

Place filling down the center of the tortilla topped a bit of cheese if desired and to a quick wrap placing seam side down in pan. Fill all 12 tortillas.

Top with remaining sauce and cheese and cover with foil and bake until the enchiladas are heated through about 20 minutes. Remove foil and bake until cheese browns (5 minutes) or until crispy (10 minutes).


Mild Red Enchilada SauceMakes 3 cups

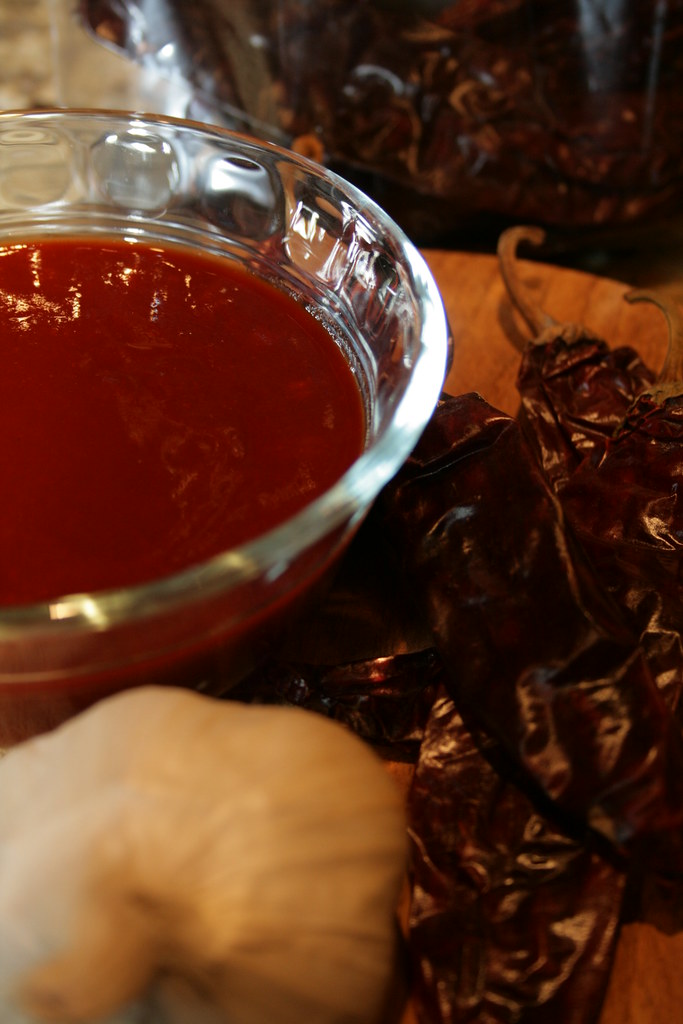
10 large dried Californian/New Mexican chili pods (in the Mexican section of the supermarket)
2 cups of hot chicken broth (just under boiling) or water
4 cloves of garlic chopped
2 teaspoons of salt

Remove stems from chillies then cut open and remove seeds.

Lightly toast chillies in an ungreased saute pan over medium heat until they are fragrant but not too dark.

Crumble chillies into a bowl and pour hot broth over top and cover bowl with a plate and let stand for 1 hour until the chillies are softened.

In a bowl of a food processor, add the garlic salt and the chillies in their liquid and process until smooth.

Strain through a fine strainer to remove the coarse skin.

Adjust your seasonings with salt, pepper, and cumin.

January 21, 2010

Stuffed Pork Chops

up close

IMG_3606


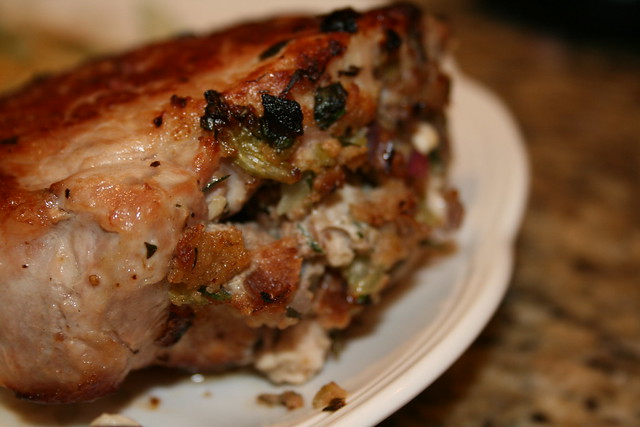
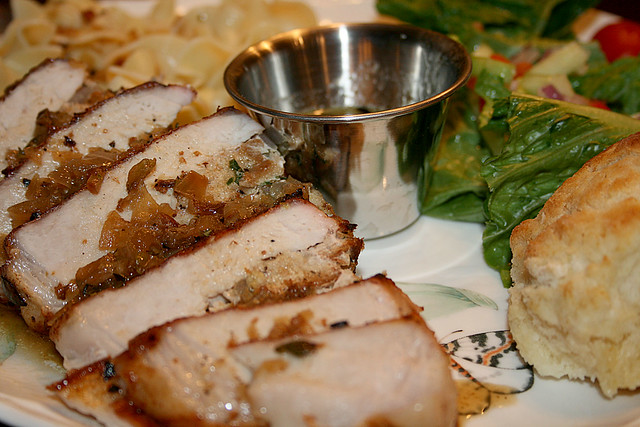
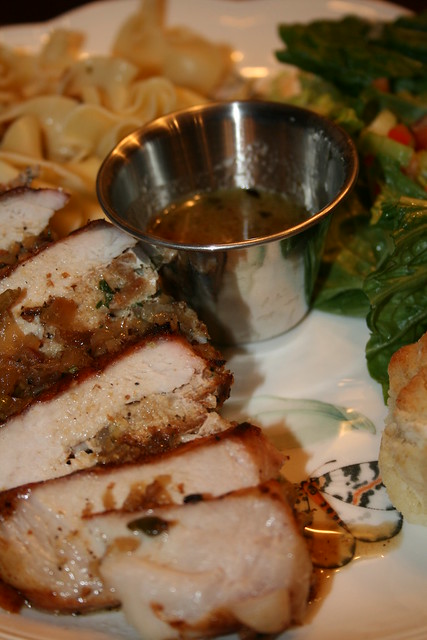
I grew up eating pork chops -my parents made them nearly every week.  While I still like pork chops, my family is not so fond of them except when I make this dish.  These pork chops are flavorful with the stuffing though I do not pack mine full of stuffing - just enough to moisten the meat and notch up the flavor of an otherwise bland meat.  The lemon thyme pan sauce is a delicious accompaniment.  As a general rule, I brine all my pork chops as I find supermarket pork lacking in flavor and tenderness.  My simple but effective brine method is a combination of sugar, salt and water.

Stuffed Pork Chops
serves 4

3 tablespoons butter
1 onion chopped fine
1 finely chopped rib of celery
¼ salt
2 tablespoons of chopped parsley
1 teaspoon dried thyme
2 cloves of minced garlic
2 slices or 2 cups of better quality bread cubed (small cubes or rough fresh crumbs) placed in medium bowl
3 tablespoons heavy cream
pepper to taste
4 pork chops (I used center thicker cut boneless and bone in chops - 3-4 pounds)
3 or 4 tablespoons oil for searing

Heat oven to 450°F.
Melt butter in skillet over medium heat.
Add onions, celery and soft cooking until softened.
Stir in the herbs and garlic and cook until fragrant 40 seconds or so.
Remove from heat and toss with bread, cream and pepper pressing until mixture comes together.
Cut a pocket along long edge of chop (I make an incision along edge then use my knife to cut a pocket without disturbing the outer edge in order to hold the bread mixture). Stuff each chop equally.
Heat oil over medium high heat in a sauté pan and brown the chops on both sides until brown (5 minutes).
Transfer to baking dish and bake until center of stuffing reaches 135°F (around 18 minutes depending on your oven).
Turn chops half way through.
You can cook your chops until they reach the internal temperature of 145°F or remove when the stuffing reaches temperature and put the chops on a plate tenting with foil (they will continue to 'cook' under the foil).
Use saute pan to make a pan sauce if desired.

Lemon Thyme Pan Sauce

2 teaspoons oil
1 shallot or ¼ onion minced
1½ cups of chicken broth
1 teaspoon of dried thyme
1 tablespoon of freshly squeezed lemon juice
3 tablespoons of chilled butter in 3 pieces

Add oil to skillet that you sauteed your chops in and heat to shimmering.
Add shallots or onions and cook until softened.
Stir in thyme until fragrant.
Add broth scraping up the browned bits off the bottom of the pan and simmer until thickened about 5 minutes.
Stir in lemon juice and additional pork juice from the plate of cooked pork chops.
Turn heat low and whisk in 1 at a time the butter pieces.
Do not add a new piece of butter until the one before it mixed in.
Take your time so as not to break the sauce.
Season with salt and pepper.

stuffed pork chops

“We shall not cease from exploration, and the end of all our exploring will be to arrive where we started and know the place for the first time. ”

IMG_9669

River Splashing over Rocks

July 26, 2009

Chicken Rigatoni

spicy chicken rigatoni

I admit, I catch Rachel Ray on the Food Network  once in a while usually when I am on treadmill, and there is nothing else is on.   Despite my annoyance at her saturation of the television airwaves, her Pasta in Vodka Sauce is a standard dish in my house and now I am adding another one - her chicken rigatoni. Apparently, this dish is common in upstate New York and it is quite good especially if you like things a little spicy.

Spicy Chicken Rigatoni
serves 4 to 6 adults

1 pound rigatoni
¾  pound chicken
¾  pound boneless, skinless chicken thighs
Black pepper
3 tablespoons extra-virgin olive oil
1 large onion, chopped
5 cloves garlic, grated or finely chopped
2 large or 3 small cubanelle peppers, seeded, chopped - I used Anaheim peppers available in my supermarket
3 roasted red peppers, chopped
6 hot cherry peppers pickled in jar, in Italian section of grocery stores - I used a spicy pepper
1 (28-ounce) can crushed tomatoes
1/3 to ½  cup cream
½  cup grated Romano or Parmigiana plus more to pass at table
½  cup basil, about 10 leaves, thinly sliced

Bring a pot of water to a boil for pasta. 
Salt water and cook pasta to al dente. 
Reserve 2/3 cup of cooking water just before you drain the pasta. 
Trim and chop all the chicken into bite size pieces. 
Season the chicken with salt and pepper.
Heat 3 tablespoons extra-virgin olive oil in a large high sided skillet over medium-high to high heat.
Add chicken to hot pan and brown all over, 7 to 8 minutes. 
Add onions, garlic, local mild fresh peppers such as cubanelle or anaheim then season with salt and pepper and cook 6 to 7 minutes to soften then add roasted red peppers. 
Cut tops off the hot peppers and scoop out the seeds with a teaspoon then chop the hot peppers and add them to the skillet. 
Stir in tomatoes. 
Bring sauce to a bubble then stir in some starchy cooking water from the pasta - about a cup, then add the cream, twice around the pan, about 1/3 to ½  cup. 
Reduce heat to lowest setting and simmer a couple of minutes. 
Add pasta and ½  cup cheese and toss to combine.
Top the pasta with shredded basil.

Serve with crusty bread.
023

plan on making this dish without the pasta and making grinder style sandwich out of it with melted mozzerella.