Showing posts with label dinner. Show all posts

November 20, 2017

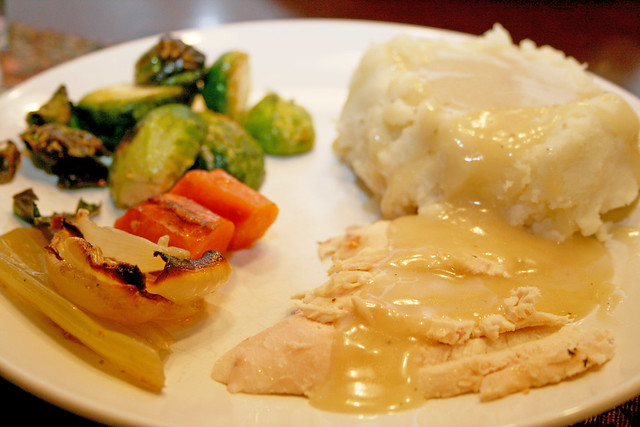
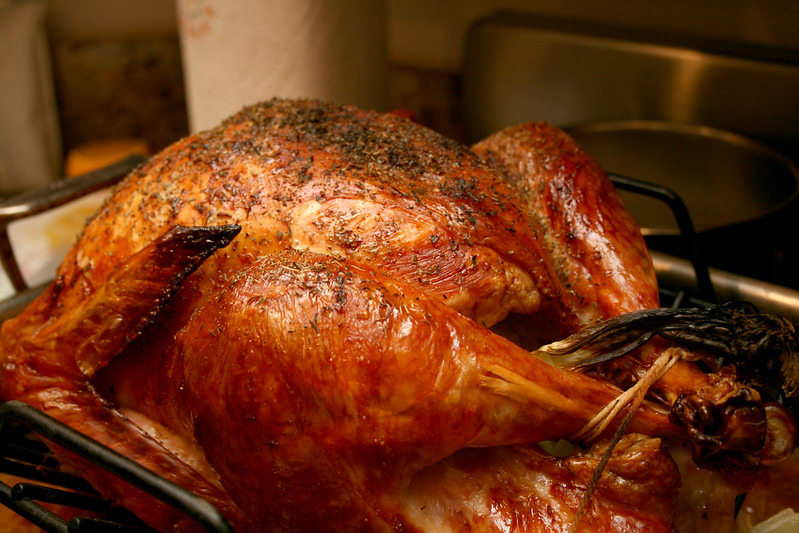
Thanksgiving Turkey


thanksgiving turkey

how I cook my turkey

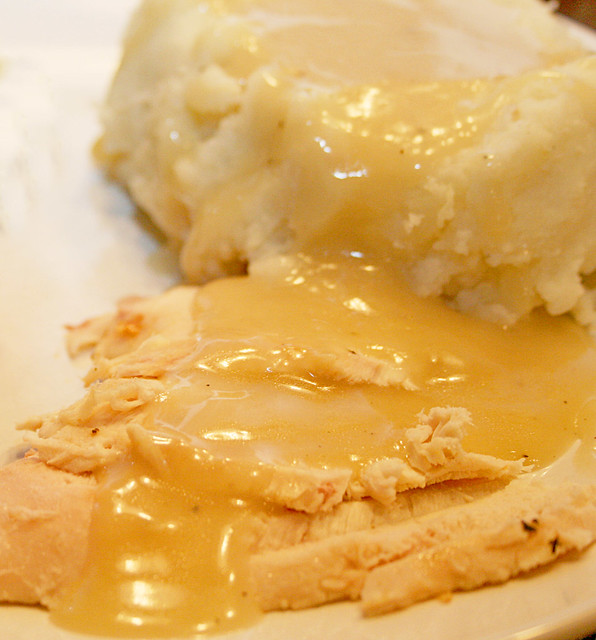
Moist and flavorful turkey covered in a rich pan dripping gravy is essential for the American Thanksgiving table.  After years of cooking Thanksgiving turkeys with okay to mediocre and dry results, this recipe delivers a turkey worthy of a Rockwell painting.  For years I cooked a turkey in the cellophane turkey bag, waiting for that button to pop up in the turkey, that turned out dry and disappointing. Then I turned to brining which added an additional time constraint and took up loads of space and resulted in salty and strangely textured turkey.  After that I smoked turkey for a couple years that turned out delicious but lacked the Thanksgiving flavor.  I heard a friend mention salt pork and moist turkey and I was intrigued and decided to give it a try.  This method of roasting turkey changed everything – with minimal effort you are able to produce a show stopping, moist, golden brown turkey.  Watch the temperatures carefully.

Roast Turkey with Cheesecloth

1 cheesecloth package, new
4 cups water
1 12 to 15 pound turkey
1 pound salt pork sliced into ¼” strips
5 celery sticks cut into chunks
7 carrot sticks cut into large pieces
2 onions cut into wedges
1 to 2 cups chicken broth

Preheat the oven to 350°F with the rack placed on the lowest position.
Remove all of the packages of giblets and neck from the cavities of the turkey.
Fold the cheesecloth into an 18 inch square, place in in a large bowl, and cover with the four cups of water.
Poke several holes in the breast and leg skin with a roasting fork careful not pierce the meat, lifting the skin as necessary.
Place turkey in a heavy duty roasting pan on a rack.
Add the celery, carrots, and onions to the cavity and bottom of the pan (these can be omitted if desired).
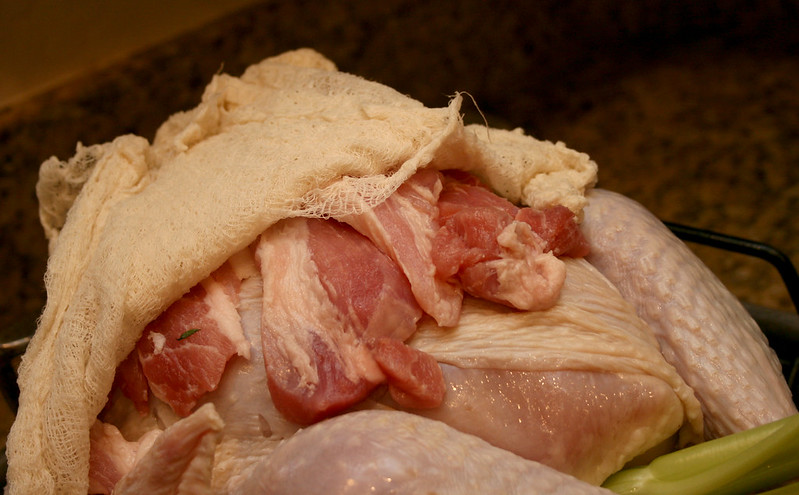
Cover the turkey with the strips of salt pork and cover with the wet cheese cloth (do not wring it out).
Add three cups of water to the roasting pan.
Cover the entire the roasting pan with heavy duty foil, making sure to seal it tight.
Roast until the breast reaches 140°F (2 ½ to 3 ½ hours).
Remove and discard the foil, cheesecloth, and salt.
Add the additional chicken broth to boost your pan drippings gravy.
Increase the oven temperature to 425°F and roast until the spot between the breast and thigh reaches 160°F (45 minutes to 1 hour).

When the turkey is done, remove it from the oven, place it on a carving board, and tent it with foil for 30 minutes to an hour to rest.
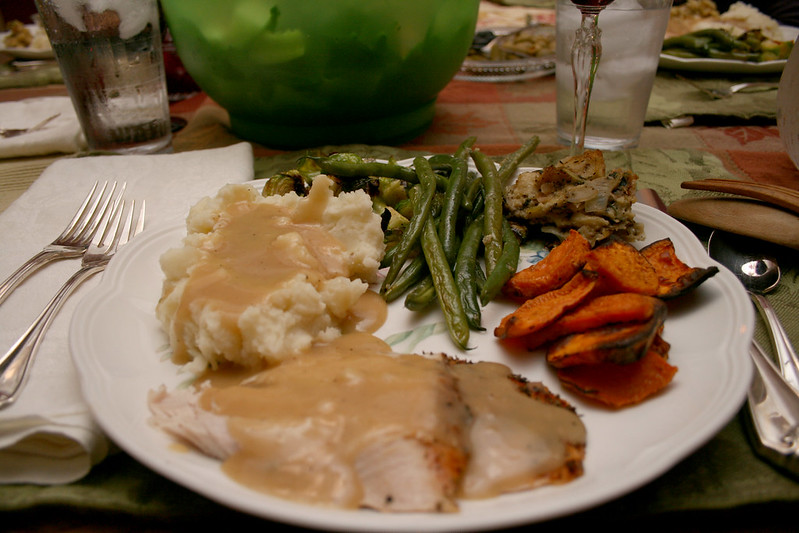


thanksgiving plate

October 12, 2016

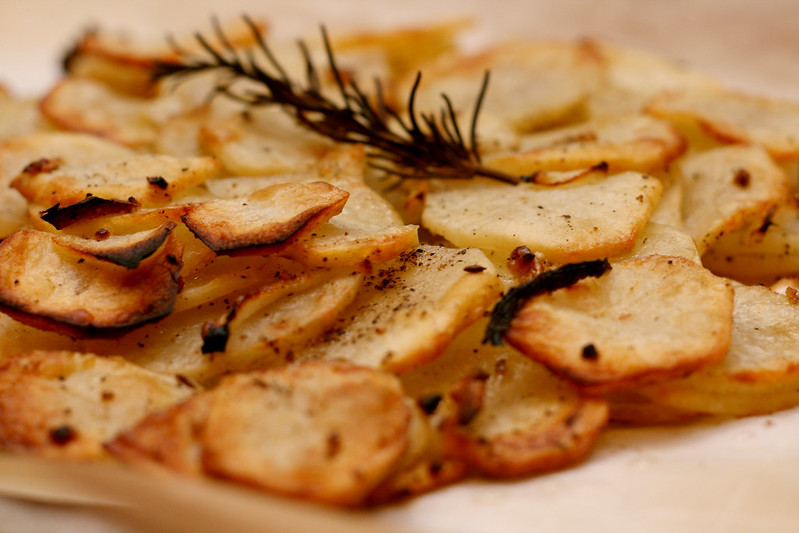
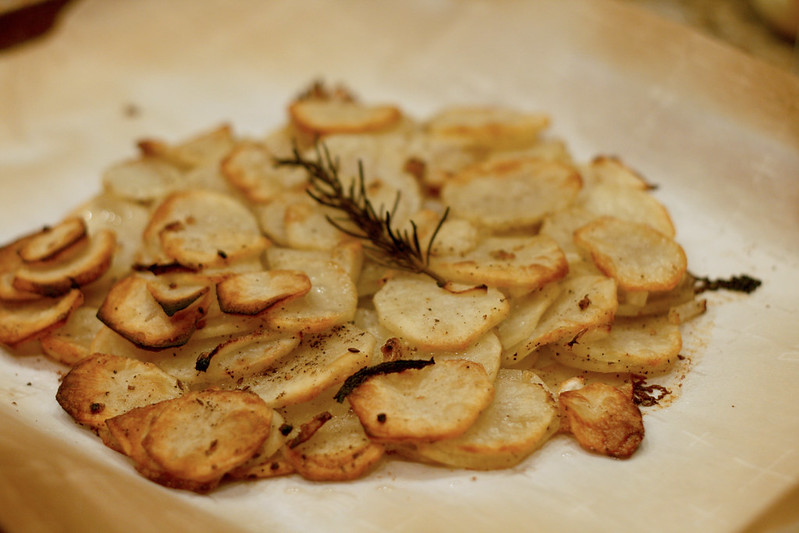
Vegan Potato Galette with Rosemary, Thyme and Caraway


olive oil and rosemary potato galette

Untitled

The flow of life is generally steady, the course is chosen and followed and down that path surprises or stumbling blocks  show up.  Over the past year I was stricken with a sudden and swift dairy and nut allergy.  It literally showed up overnight but it took me a whole year to realize that I must be dairy free.  My beloved butter has been the last to go. So now I am on a quest to find creamy goodness without dairy or everything tasting like a coconut as many vegan recipes rely heavily on the coconut.  

This is a simple, crisp and delicious recipe.  For a non-vegetarian version swap out 2 tablespoons of the olive oil for 2 tablespoons of rendered and melted bacon fat.

If you prefer butter and a cast iron pan, see this recipe.

Vegan Potato Galette with Rosemary, Thyme, Caraway and Onions

¼ cup (4 tablespoons) extra virgin olive oil
2 tablespoons non-dairy butter like Earth Balance
1/2 teaspoon caraway seeds
1 teaspoon (or more) kosher salt
1/2 teaspoon freshly ground black pepper
2 pounds Yukon Gold potatoes cut into 1/8'-thick slices with a mandolin slicer
1 small thinly sliced sweet onion

Preheat to 425°.
Arrange a rack in middle of oven.
Line a baking sheet with parchment paper or use a Silpat rated for 425°.
Set the ring portion of your 9 inch spring form pan on the paper.
Toast caraway in a small skillet over medium heat until fragrant, about 1 minute and let cool slightly.
Crush in with mortar and pestle or with a rolling pin or meat mallet.
In a large bowl toss to coat potatoes, olive oil, salt, pepper, crushed caraway seeds.
Arrange 1/4 of potatoes in an even layer inside ring on baking sheet to create a solid overlapping base.
Toss onion in a large bowl with 1 Tbsp. melted dairy-free butter, or regular butter if using.
Arrange 1/3 of onion over potatoes.
Repeat layers two more times for a total of 3 potato and 2 onion layers.
Finish with a layer of potatoes.
Carefully remove ring.
Bake until potatoes are tender, about 45 minutes.
Dot the top of the galette with small bits of the remaining tablespoon of butter (vegan or regular).
Bake for 5 to 10 minutes until edges of potatoes are deep golden and top is crisp
Run a thin spatula under galette to loosen from foil and move to a serving dish.


Season the galette with salt and pepper.

October 24, 2014

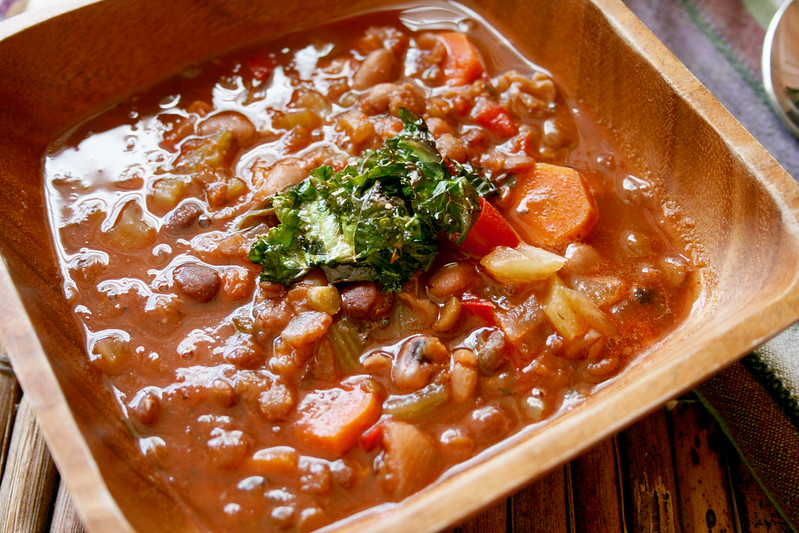
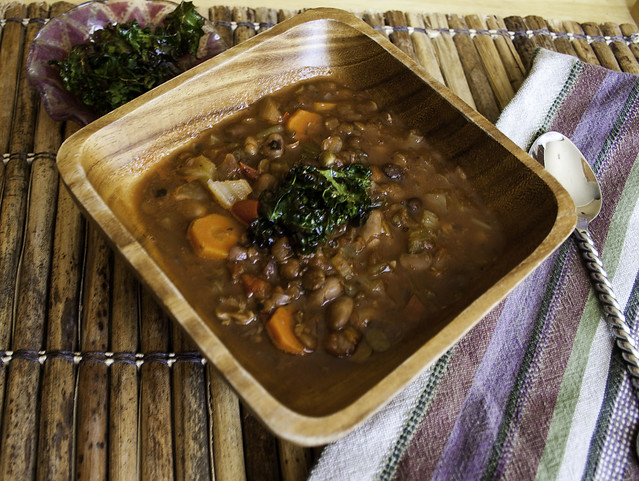
Ten Bean Soup with Kale Chips


IMG_1387a

IMG_1409a

Soup satisfies on every level, especially this Ten Bean Soup – the savory aroma fills the house, the flavor warms the soul, the temperature soothes, it looks beautiful, the texture of the various beans and vegetables is satisfying and the best sound is the ladle filling a soup bowl.  I never found inspiration in the packages of bean soup mix.  As I searched out my favorite lentil, I would give a passing glance until I started shopping the bulk bins at Sprouts.  I saw the gorgeous bean mixture which is more than 10 beans, and, often offers different varieties.  After controlling my urge to dive my hand deep down into the dried beans, I thought I just have to try to make this into a soup.  The flavor is a traditional vegetable soup with loads of beans.  The best part about this recipe is you use your crock pot and cook the soup all day long!

Ten Bean Soup
Serves 4-6

1-3 cups of a ten bean or multi bean mixture
4 stalks of celery, cut into a 1-inch dice
3 carrots, peeled and sliced into rounds
1 28 ounce can of diced tomatoes or 2 big vine tomatoes
1 green bell pepper
1 small or ½ big red or white onion
2 teaspoons dried oregano
1 teaspoon dried basil
1 teaspoon dried parsley or a small bunch of fresh parsley
1 teaspoon dried thyme
2 cloves of garlic, minced
4 cups chicken broth or water
Salt to taste

Rinse the beans picking over for small stones.
Soak them in water overnight around 12 hours in a large bowl.
Drain the water and rinse.
Chop all the vegetables to 1 inch pieces.
Place all the ingredients, i.e. the beans, vegetables, spices, salt and stock in a crock pot. Let it cook slow and nice for the next 10 hours on low.

Sometimes, I use the high setting if I don’t soak my beans for the full 12 hours.  I have cooked the soup for the full 10 hours with an 8 hour bean soak and still end up with some of the beans not as soft as I would have liked. 


IMG_8267


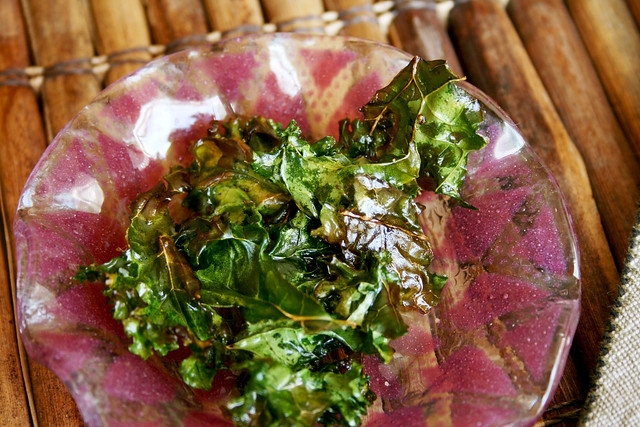
Kale Chips  

Tear washed and dried kale into medium to small pieces.
Toss with olive oil until well coated.
Toss with salt and pepper, of your choice.

Fry in a small pan on the stove top if you are doing a small amount.
Large amount - bake in the oven at 400 degrees Fahrenheit, turning at least once, and check frequently as they can go black quickly.

IMG_1405a 

Untitled
Untitled

Golden Glow

April 13, 2014

Italian Style Meatballs

021

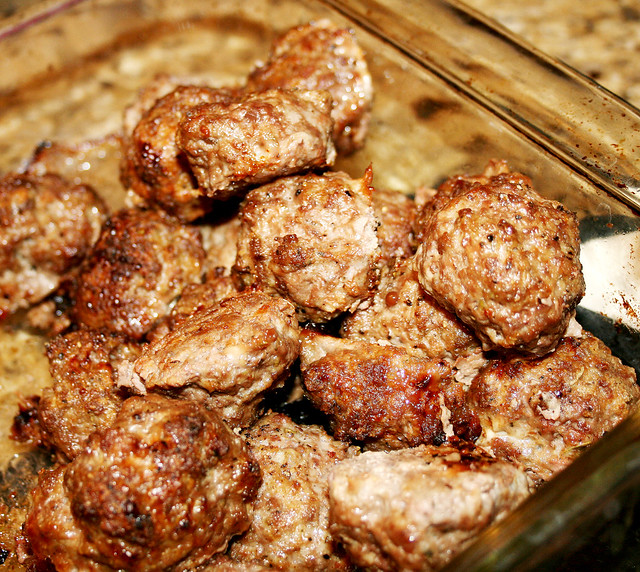
    Meatballs are the kind of food that brings happiness.  Daily I am asked “What’s for dinner?” and when I reply meatballs and…….it doesn’t matter what the second part is -- the questioner is instantly happy on the word meatballs – “yummmm.” 
    As a child, commercially pressed hamburgers were more common than hand formed meatballs.  Meatballs were part of our special homemade spaghetti sauce dinners where the sauce bubbled all day on the stove top.  Dad would fry them on the stove top versus baking in the oven. My sister reminded me of our father’s perfectly shaped meatballs and his penchant for frying the meatballs, as with many things he cooked, on high and the grease spattering. 
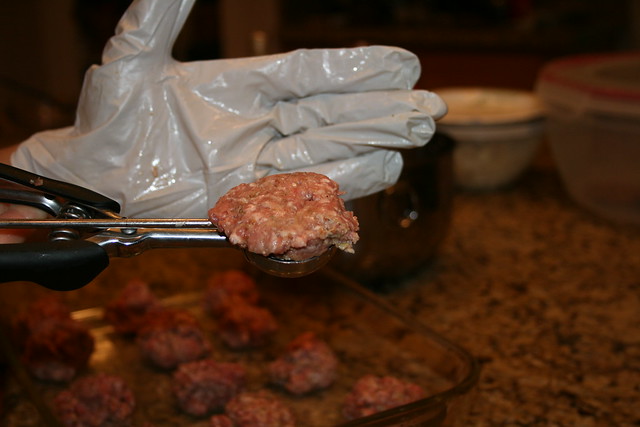
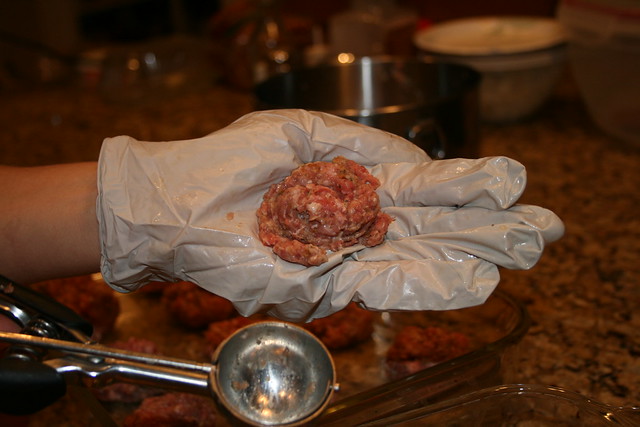
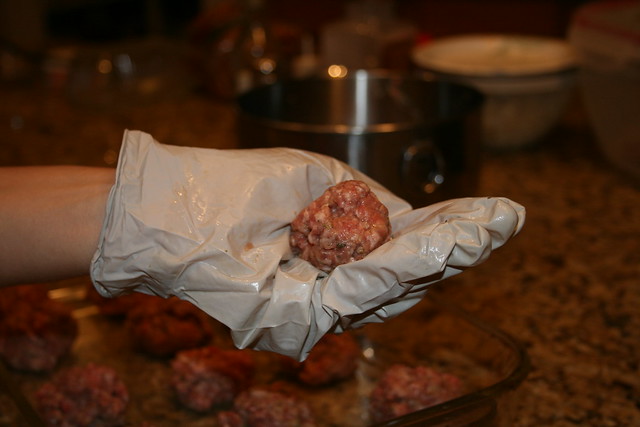
     While I love a tasty meatball, I do not favor all the handwork involved so I have a method that reduces the hand rolling time by using my graduated size cookie scoop to begin the molding process.  I have three sizes of scoops and I most often use the 1 ½ tablespoon middle size but sometimes I like the small (2 teaspoons) size for fun marble size meatballs and rarely do I make the larger size.
     Meatball recipes have many variations – my ideal Italian style meatball is moist, mildly spiced, and compliments mainly a red sauce and must be cooked in the oven.   

Meatballs
Makes around 20 meatballs

1 pound of ground beef
2/3 cup of shredded Parmesan cheese
1/3 cup of fresh bread crumbs
¼ cup milk
1/3 cup of finely chopped onions (optional)
1 celery stick finely chopped (optional)
Chopped fresh parsley (optional)
1 teaspoon Italian blend spices or spice mix of your choice – basil is nice
1 egg slightly beaten
Salt and pepper

Preheat oven to 400 F°.
Combine the ingredients with your hands being careful not to overmix.
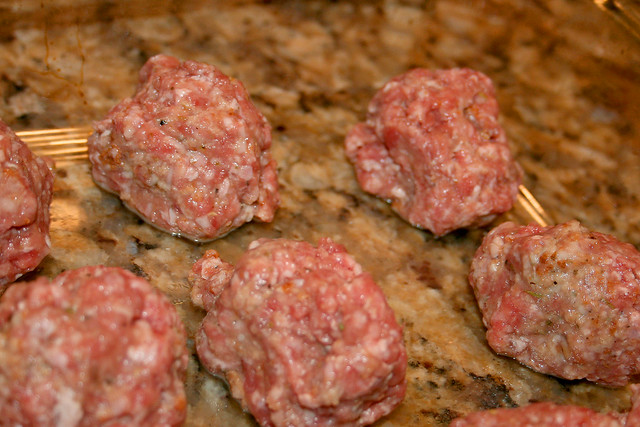
Shape into walnut size or larger balls.
Place in baking dish.
Bake for 20 minutes or until done. 

Loosen meatballs and drain off accumulated oil.  

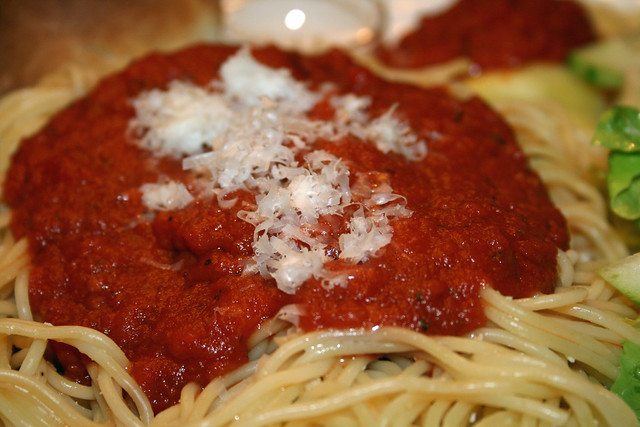
Serve with spaghetti and red sauce:
quick and easy red sauce

011

016

013

014

7983326849_785f16db99_oaa
My sister's photo from Northern Italy - a view she saw eating lasagne from a cafe in Brunate.

April 1, 2014

Beer Can Chicken

034a

the waterfall

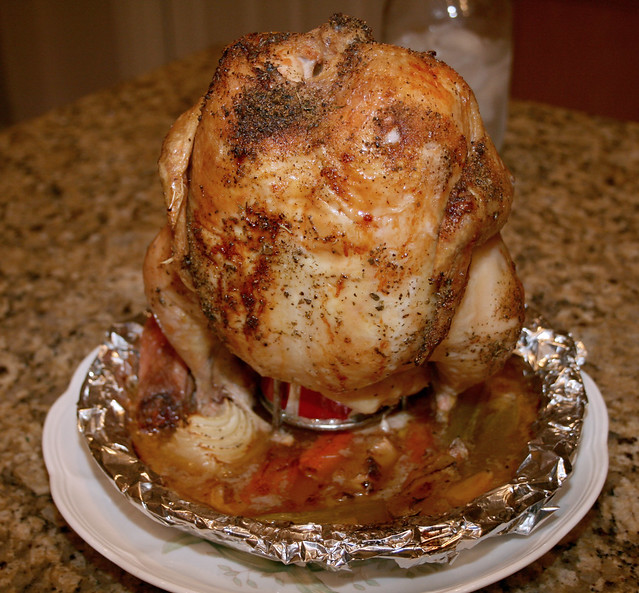
One of my favorite ways to roast chicken is on the grill with the chicken poked onto a beer can.  Beer can chicken makes a wonderfully moist and delicious chicken every time without the need for a spit or rotisserie. I always associate a roasted chicken dinner with taking time and being a special dinner.  The smell of roasted chicken evokes thoughts of comfort, warmth and caring.  When a chicken is roasting I often hear “it smells so good!” It is little wonder that grocery stores churn out hundreds of rotisserie chickens every day and are at their peak smelling point when the work day is done. By making beer can chicken at home you can control your flavor profile and have a delicious home cooked meal to share with your family and friends.

Part 1 of 3 of the Chicken that Keeps on Giving

Beer Can Chicken

1 roasting chicken - about 5 pounds
2 carrots peeled and chopped into pieces
1 stalk of celery chopped in medium pieces
1 small onion quartered
3 to 4 garlic cloves peeled and left whole
1 cup chicken stock, approximately
1 tablespoon oil of your preference
½ teaspoon sage
½ teaspoon thyme
¼ teaspoon paprika*
Salt and Pepper

Preheat grill with a lid that can accommodate an upright chicken – gas, charcoal, or smoker. I use a gas grill.
Place beer can chicken holder in a 9-inch foil pan.
Scatter the chopped vegetables across the bottom of the foil pan and holder.
Rinse chicken and pat dry.
Empty about half of the beer out of can and widen the opening.
Put beer can in the holder and place chicken on top, legs down and inserting can into the chicken cavity.
Brush chicken with oil and sprinkle with spices, salt and pepper over the entire skin surface. I do this with the chicken on the stand.
Tuck in wings.
Place chicken on the grill.
Turn the burner to low that the chicken is over and lower the other side to medium high. 
Add the chicken broth to pan a little over halfway up leaving room for drippings.
Cook until an instant read thermometer reads 165°F about 1 to 1 ½ hours. 
Depending on your grill you may turn off the burner under the chicken.  Mine goes low enough. 
Remove chicken to plate without spilling the beer in the pan juices or splashing onto the chicken unless you want that flavor in you final product.

*Other spice combinations:
rosemary and lemon zest
granulated garlic and oregano
savory and garlic

any barbecue rub

IMG_8554a

March 14, 2014

Chicken Fried Steak with Milk Gravy

029a

    My husband's mother has deep roots in West Texas, and he loves Texas style food.  He enjoys that stick to your ribs and stomach filling quality.  While his mom did not prepare those kinds of food for him as she had had enough fried foods as a child and teenager, preferring a simpler dinner of tacos and chili. She says she thought there was only milk gravy until she married and learned otherwise.   
    My husband’s grandmother, Tommie's method of cooking was to fry.  Tommie grew up on a ranch in West Texas watching her mother and grandmother cooking on wood fired stoves.  My mother-in-law remembers her grandmother getting up every morning and starting the fire and making biscuits and gravy without fail.  They would eat a large breakfast and Grandpa would take biscuits wrapped in a handkerchief with him for lunch while he was out working on the ranch. 
     My husband received from his grandmother a cast iron pan with this recipe for milk gravy taped inside for Christmas one year.  It is a real treasure to have her handwritten recipe, and the square cast iron pan is my favorite to bake biscuits in.


87656-PH-42-005
Great-grandfather, Tommie, mother-in-law at the ranch house where daily biscuits and gravy were made.
Chicken Fried Steak with Milk Gravy

4 cube steaks
¾ cup flour
¾ cup panko or white bread crumbs dried or fresh
Dash of cayenne if desired
1 teaspoon salt
1 teaspoon pepper
1 egg
½ cup milk
Additional ½ cup plus more, if needed, for dredging meat
Oil for frying.

In a shallow dish or a plastic bag, mix flour, panko or bread crumbs, cayenne, salt and pepper.
In a shallow bowl, whip egg and milk together.
On a separate plate put ½ cup of plain flour.
Dredge cube steak in plain flour, covering both sides, shaking off excess flour.
Put the floured cube steak in the egg bath, careful not to make too soggy, let excess egg mixture drip off.
Coat cube steak with the flour and panko mixture, making sure it is covered well.
Repeat with all the steaks, adding more flour as needed.
Heat a large heavy duty skillet over medium high heat and add ¼ to ½ cup oil.  Heat to very hot.  Fry each cube steak until golden brown of each side over a high heat (if you fry with lower heat, the meat and coating becomes very greasy).
Remove the cube steaks carefully with a thin metal spatula so not to tear off the coating.
Transfer to a sheet pan and place in a 300 degree Fahrenheit oven until the gravy is done.

Milk Gravy

2 cups of milk
2 ½ tablespoons of oil
2 heaping tablespoons of flour
Salt and pepper to taste

After the meat is done, drain off excess oil leaving 2 ½ tablespoons of oil. 
Heat pan over medium heat, and add flour and mix together with the oil forming a roux.
Brown roux stirring up brown bits as you stir.
Slowly whisk in milk stirring constantly while mixture thickens. 
Bring to a boil and boil gently for 1 minute, stirring constantly.
Add more milk if too thick.
Remove from heat.

The milk gravy thickens as it stands. Whisk in more milk over medium heat until the desired consistency is reached.

Biscuit Recipe


069a

027a

024a

87656-PH-1800-008
Ranch house on rocks
87656-PH-1800-006
Ranch Living

87656-PH-1800-007


February 18, 2014

Meatloaf

Meatloaf, Baked Mac & Cheese, Acorn Squash and Salad

152a
I love meatloaf!  I have had and made some dry meatloaf.  This recipe is moist and delicious. I especially like meatloaf the next day sliced with mustard for a sandwich.  People who have an aversion to meatloaf have said this is good meatloaf.  There are a few steps but they are worth it.  Remember don't overwork the meat when mixing.

MEAT LOAF  
makes 2 small loaves

Glaze
1/2 cup ketchup or chili sauce
2 tablespoons brown sugar
2 teaspoons cider vinegar or white vinegar

Meat Loaf
I1 tablespoon vegetable oil
1 onion, chopped fine
2 garlic cloves, minced
1/2 teaspoon dried thyme
2 large eggs
1/2 cup milk, plus extra as needed
2 teaspoons Dijon mustard
2 teaspoons Worcestershire sauce
1/4 teaspoon hot pepper sauce
1 teaspoon salt
1/2 teaspoon pepper
2 pounds ground beef
2/3 cup fresh breadcrumbs
1/3 cup finely chopped parsley

Adjust the oven rack to the middle position, and preheat to 350 degrees. Line a baking sheet with aluminum foil, and set aside. Heat the oil in an 8-inch nonstick skillet over medium-high heat until shimmering. Add the onion and cook until softened, about 5 minutes. Stir in the garlic and thyme and cook until fragrant, about 15 seconds. Set aside to cool for 5 minutes.

146

Meanwhile, mix together the ketchup, brown sugar, and vinegar and set aside.
In a separate bowl, mix the eggs, milk, mustard, Worcestershire, salt, pepper and Tabasco together.
Mix the meatloaf mix, bread crumbs, parsley, sautéed onion mixture, and egg mixture until evenly blended and the mixture doesn’t stick to the bowl (if the mixture sticks, add additional milk, a tablespoon at a time, until it no longer sticks).

143

Turn the meat mixture onto the foil-lined baking sheet and shape into a 9 by 5-inch loaf. Brush with half of the ketchup mixture. Bake the loaf for 45 minutes. Freezer-friendly variation: I divided the mixture into two smaller loaves, and brushed each loaf with about one-fourth of the ketchup mixture instead.

149

Bake until the center of the loaf measures 160 degrees on an instant-read thermometer, about 15 minutes. Let cool for 20 minutes before slicing and serving.

Untitled

Meatloaf baked outside of the loaf pan.

February 15, 2014

Chicken Pot Pie with Biscuits

chicken pot pie with biscuit "crust"

IMG_8618

Comfort food is home cooking.  It is used when speaking about food that smells delicious, has enough fat and carbohydrate content to satisfy the palate and is pleasantly filling.  Comfort food gives a sense of well being.  My comfort foods are associated with my childhood and linked to specific memories.  As a small child eating Swanson's frozen chicken pot pies was a real treat.  I can remember the excitement of my mom or dad cooking those pot pies.  My parents did not buy too much from the freezer section but sometimes we had a t.v. dinner, and I remember pulling back the metal top and the little square of dessert, but those don't trigger the same feeling as pot pies.  I remember when the pot pies had both a bottom and a top crust then they changed to only the top crust and that was disappointing.  I grew up and didn't think much of pot pie until a trip to Disneyland and eating at the Carnation Cafe on Main Street and my son ordered chicken pot pie.  His dish brought back a lot of memories and I decided to make it.  I like pot pie not only because it is filling and comforting but I also appreciate the economy of it.  If I have a lot of left over chicken, I make it.  

I have made pot pie with a top and bottom crust but I prefer the biscuits to add that extra layer of home cooking.  The biscuits remind me of dumplings at the bottom and biscuits on top. 

Chicken Pot Pie with Biscuits
2 to 3 pounds precooked chicken cubed (I use leftover chicken from grilled chicken breasts to leftover roasted chicken)
2 tablespoons vegetable oil
1 large onion , chopped fine
2 medium carrots , peeled and cut into sticks and then across to create squares 1/4-inch thick
2 small ribs celery , cut crosswise 1/4-inch thick
2 garlic cloves, put through a garlic press
1/2 teaspoon dried thyme
Salt and ground black pepper
2 tablespoons unsalted butter
1/2 cup unbleached all-purpose flour
3 tablespoons dry white or red wine
2 1/2 cups chicken broth
1/4 cup heavy cream
1 bay leaf
3/4 cup frozen peas , thawed
3 tablespoons minced fresh parsley leaves

Adjust oven rack to low-center position; heat oven to 420 degrees Fahrenheit. 
Set a large pot or a dutch oven over medium heat, heat oil.  
Add onions, carrots, and celery; sauté until just tender, about 5 minutes. 
Add garlic and thyme and continue to cook for about 1 minute
Season to taste with salt and pepper. 
Add butter and melt (the vegetables are still in the pot)
Add flour and stir together until a paste forms the cook for 1 minute.
Stir in wine working up any bits on the bottom.
Whisk in the chicken broth and bring to a simmer on low until thickened.
Stir in the cream and bay leaf.
Add the chicken and heat through.
Add peas and parsley.
Make biscuits - see below.
Pour into a 9 by 13 inch baking dish.
Place biscuits on top of the hot chicken mixture and place in the oven.
Bake until biscuits are golden brown and filling is bubbly, 20 to 30 minutes.

Biscuits
makes about 12 biscuits

2 cups all purpose unbleached flour
4 teaspoons baking powder
1 teaspoon salt
6 Tablespoons of cold butter cut into 1 inch or so cubes
3/4 cup of milk

Mix the flour, salt, and baking powder together in a large bowl. Add the ice cold butter cubes to the flour mixture making sure they are not clumped together.

Cut the butter into the flour with a pastry cutter or two knives until you have about large pea size pieces - it is important not to over do this.

Stir in the milk until the ingredients just come together. Turn out onto a floured surface and knead 1 or 2 times until the shaggy dough comes together. Pat into a rectangle and fold edges into each other, turn dough and fold again (folding this way allows for a flakier biscuit).  Pat out until about 1/2 inch or so high. Cut into rounds with a biscuit cutter or glass dipped into flour.


jonquils

Underneath

Untitled

February 8, 2014

Chicken Sauté

IMG_8326

Learning to cook has been a long process of successful and not so successful meals.  My desire for a particular dish was often overshadowed by my skill level until I started watching PBS's Saturday chef programs and Craig Clairborne's Kitchen Primer.  The Kitchen Primer lifted me out of boring meals that relied on pre packaged foods to using fresh foods that were simple yet delicious -- every time I made it!!!
I have made chicken sauté for many years and it is my go to dish.  It can be elevated with the use of shallots or green onions or kept simple with the yellow or white onions you have on hand.  The gravy over rice is very satisfying.    This recipe allows for creativity - add mushrooms, garlic, or spices such as thyme at the same time you soften your onions. This dish is a family favorite.  I always serve over rice with biscuits.

Chicken Sauté
Serves 4-5

4 chicken breasts (about 3 pounds) pounded to an even thickness
Salt and Pepper to taste
3 tablespoons oil of your choice
1/4 cup finely chopped shallots or green onions, or yellow or white onions (what I have on hand)
6 mushrooms sliced if desired
1/3 cup dry white wine (I use the wine I have on hand (not sweet)- red or white, usually red)
3 tablespoons butter
3 tablespoons of flour
1-2 cups of chicken broth

Pound chicken breasts with a mallet in a plastic bag to 1/2 inch uniform thickness.
Salt and pepper chicken to taste.
Heat oil in large sauté pan over medium heat and add breasts in one layer.
Cook over medium heat until brown on one side about 3 minutes, turn breasts to other side and brown for 3 minutes.
Remove breasts from pan to plate temporarily (the breasts will be added back in a few steps).

Add onions to oil in pan (about 3 tablespoons should remain) and soften for 3 to 4 minutes stirring.
Add the wine, scrapping up the brown bits on the bottom of the pan (the fond).
When the wine has reduced pour over the chicken.
Add butter and flour and whisk together making a roux, cook until brown, around 3 minutes.
Whisk in chicken broth to roux and whisk until smooth and mixture thickens.

Return the chicken and wine reduction to the gravy stir to blend.
Place lid on pan and simmer chicken for 5 minutes on each side or until tender.

Serve over rice.

Birthday Boy's Favorite Dinner

chicken sauteLucky

Recipe inspired by Craig Clairborne, Kitchen Primer

September 25, 2012

Ricotta Cheese

IMG_6886

IMG_7427

My family husband is not a big fan of ricotta cheese and its grainy texture which comes from the industry's cost effective standard of adding gums and carrageenan thickeners instead of the time consuming separating the whey from the cheese.  After a little research I discovered that ricotta could be made at home without the addition of rennet, citric acid, lipase or the use of any other special cheese making equipment other than cheese cloth.  I was inspired by a lasagna my sister ate while traveling in Italy.  It wasn't the lasagna I grew up on where the portion is thick with layers of ricotta, sauce, meat and noodles which I do like but it is an all day affair to make the giant American version of lasgna.

Craving lasgna after I saw my sweet sister's delicious photo, I decided to make the ricotta cheese and use it on a quickly composed lasagna for dinner.  We spread the leftover ricotta on crackers, bagels and toast later in the week.  Its consistency was like cream cheese and it was very mild in flavor.  I imagine that the flavor would be more robust if local milk, goats milk, or raw milk were used in the recipe.  For me, it felt like a real accomplishment making homemade cheese even if it was so easy to make.

Ricotta Cheese
Makes 4 cups
1 gallon whole milk
1/8 teaspoon salt
¾ cup fresh lemon juice

Pour the milk into a large, nonreactive pot and season with salt.
Heat the milk to 190º (use a candy thermometer), stirring it every few minutes to keep it from scorching on the bottom.
Turn off the heat and add the lemon juice. Stir slowly until you see curds beginning to form. (The curds form quickly after the addition of lemon juice).
Let the pot of curds and whey sit undisturbed for 5 minutes.
Double line a colander with cheesecloth and place it over another bowl to catch the whey.
Pour the curds and whey into the colander and let the curds strain for at least an hour,
then discard the whey.
Store in an airtight container and refrigerate until ready to use.


IMG_6885

IMG_7444
I served a little extra ricotta on the side - yum.

Untitled
The Inspiration - My sister's lasagna in Northern Italy

IMG_6881
Heat milk to 190F

IMG_6898
I hung my cheese as it still seemed wet after the 1 hour in the strainer. 
IMG_7445

IMG_6947