
I have always wanted to understand the mysteries of making bread. As a small child I watched my mother mix and knead bread by hand in our kitchen in southern California. She stood at the counter to the left of the stove and kneaded the dough with a passion. Times were tough and homemade bread was more economical than store bought bread. This was during the times when store bought manufactured products symbolized ease, convenience, stability and success. I loved the smell of the yeasty dough, the magical round of dough in a bowl rising under a towel on the stove, and the wonderful smell of baking bread that filled the house. This bread was precious even though it came about during a time of hardship it bound my family together around our small table with the cozy warmth that homemade bread brings to a home.
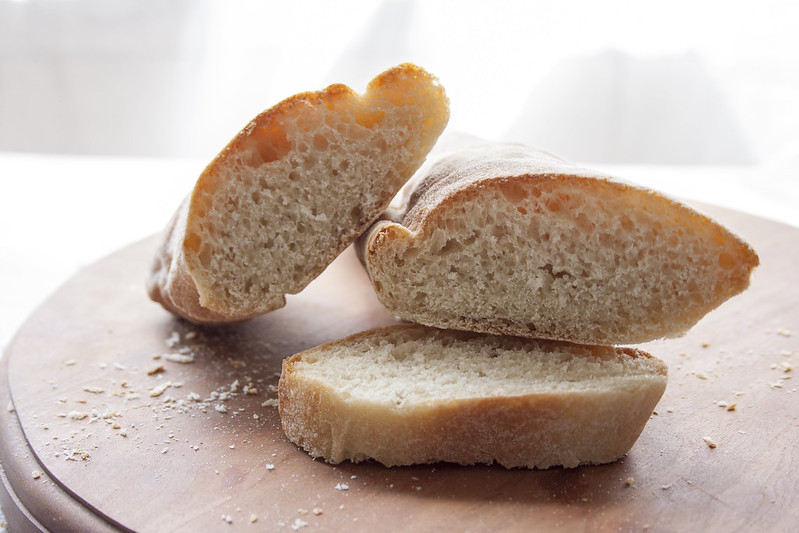
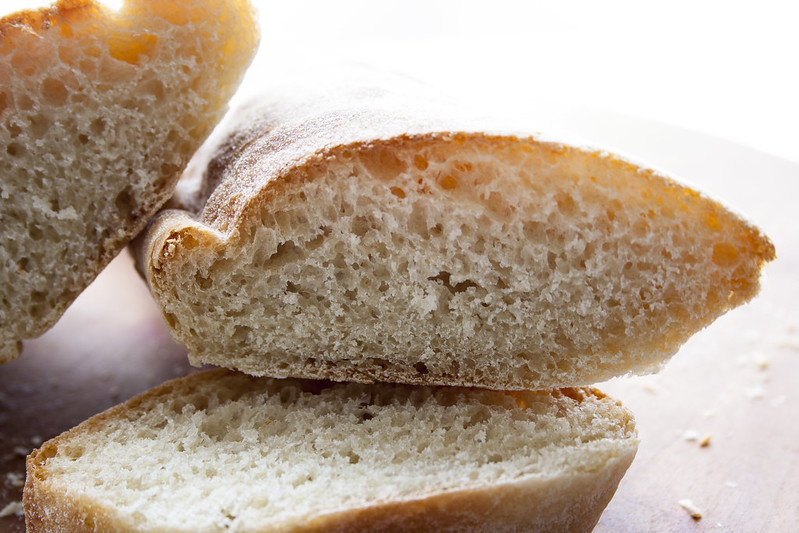
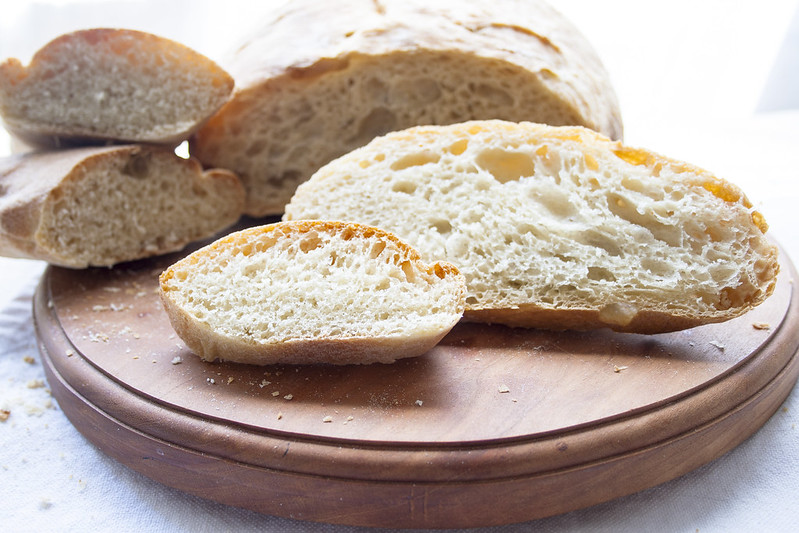
I have yet to master bread making but year by year I increase my skills as I continue to make and try new recipes. I have always wanted to use a starter so this was my first attempt. My son was inspired to make bread while I made this bread and he made No Knead Bread and we had a taste test between the two (the round loaf in the bottom photo). The Mixed Starter bread had a deeper, richer flavor than the no knead bread which I contribute to the longer process of flour and yeast development .
Two Day Mixed Starter Bread
DAY ONE
Old-dough Starter - 8 hour rise
½ ounce
of risen dough from white bread or pizza (I saved a piece of my pizza dough)
¼ cup
warm water (105ºF to 115ºF)
2/3 cup
unbleached all-purpose flour
Second Starter - 4 hour rise - up to an 8 hour chill
All of
the old-dough starter
¼ cup
warm water (105ºF to 115ºF)
¾ cup
unbleached all-purpose flour
DAY TWO
Final Dough – 1 ½ hours rise
1 ¼ cups
cool water (78ºF)
3/4 teaspoon
active dry yeast
Second
starter, cut into pieces
3 1/3
cups unbleached all-purpose flour
1
tablespoon kosher salt
Shape Dough, Final Rise – 1 ½ hours, Bake – 20 minutes
Old-dough Starter
Cut the
old dough into pieces and add them to stand mixer bowl.
Add the
warm water, and let sit for about 5 minutes.
With
the paddle, gradually add the flour for 2 to 3 minutes.
Place
it back into the bowl, cover with plastic wrap, and let it rise in a warm place
for about 8 hours.
The
dough will be soft, springy, bubbly and sticky.
Second Starter
Scrape
old dough starter onto cutting board and cut into 4 pieces.
Place
pieces in stand mixer mixing bowl and add warm water.
Let
dough soften for about 5 minutes.
Mix in
flour with paddle attachment and mix on low for 2-3 minutes.
This
dough will be soft.
Transfer
dough to large bowl, cover with plastic wrap and let rise in a warm place for 4
hours.
The
dough will double and the gluten will be long and lacy when stretched and smell
sweet and yeasty.
Chill
dough for a minimum of 1 hour but no more than 8 hours.
Final Dough
In the
bowl of a stand mixer, add the water, the yeast, and the second starter pieces.
Let sit
for 5 minutes.
Add all
of the flour and mix at low speed with the paddle until dough is cohesive and
flour is incorporated.
Let
dough rest for 10 minutes.
Sprinkle
the salt over the dough.
Knead on
medium to medium high for about 8 minutes.
Dough
will be soft and moist.
If the
dough rises up the hook push back down into bowl.
Place
the dough into an oiled bowl and cover with plastic wrap.
Let it
rise for 90 minutes in a warm spot (80ºF to 85ºF).
The
dough will have bubbles visible under the surface.
Gently
stretch and fold the dough over itself from all four "sides," and let
it rise, covered, for another 45 minutes.
Baguette Shape
Portion
off dough into 10 ounce pieces.
Shape
into rough rectangles without smashing the dough.
Working
rapidly, turn the dough upside down on a lightly floured kneading surface and
pat it firmly but not too roughly into an 8 to 10 inch oval with the lightly
floured palms of your hands. Deflate any gas bubbles in the dough by pinching
them.
Fold
the dough in half lengthwise by bringing the far edge down over the near edge.
Being
sure that the working surface is always lightly floured so the dough will not
stick and tear, which would break the lightly coagulated gluten cloak that is
being formed, seal the edges of the dough together, your hands extended, thumbs
out at right angles and touching.
Roll
the dough a quarter turn forward so the seal is on top.
Flatten
the dough again into an oval with the palms of your hands.
Press a
trench along the central length of the oval with the side of one hand.
Fold in
half again lengthwise.
This
time seal the edges together with the heel of one hand, and roll the dough a
quarter of a turn toward you so the seal is on the bottom.
Now, by
rolling the dough back and forth with the palms of your hands, you will
lengthen it into a sausage shape. Start in the middle, placing your right palm
on the dough, and your left palm on top of your right hand.
Roll
the dough forward and backward rapidly, gradually sliding your hands towards
the two ends as the dough lengthens.
Deflate
any gas blisters on the surface by pinching them. Repeat the rolling movement
rapidly several times until the dough is 16 inches long, or whatever length
will fit on your baking sheet. During the extension rolls, keep circumference
of dough as even as possible and try to start each roll with the sealed side of
the dough down, twisting the rope of dough to straighten the line of seal as
necessary. If seal disappears, as it sometimes does with all-purpose flour, do
not worry.
Place
the shaped piece of dough, sealed side up, at one end of the flour rubbed tea
towel, leaving a free end of canvas 3 to 4 inches wide.
The top
will crust slightly as the dough rises; it is turned over for baking so the
soft, smooth underside will be uppermost.
Pinch a
ridge 2 1/2 to 3 inches high in the tea towel to make a trough, and a place for
the next piece. Cover dough with plastic while you are forming the rest of the
loaves.
After
all the pieces of dough are in place, brace the two sides of the tea towel with
long rolling pins, baking sheets or books, if the dough seems very soft and
wants to spread out. Cover the dough loosely with flour rubbed tea towel, and a
sheet of plastic. Proceed immediately to the final rising, next step.
Place a
pizza stone in your oven, and preheat it to 450ºF.
Place a
cast iron pan on bottom rack and fill with 1 cup of water. 2 minutes before
loaves go in.
Flip
loaves onto a rice flour or corn meal coated peel or cookie sheet without
sides.
Slash
the baguettes with a razor or very sharp knife.
Make 3
diagonal slashes the length of the bread.
Slide
loaves onto baking stone quickly to maintain the ovens temperature and steam.
Bake
for 20 minutes until golden brown and interior temperature reads
Cool
completely on a wire rack.
No comments:
Post a Comment